 WOWOW Faucets
Classification of sink drains
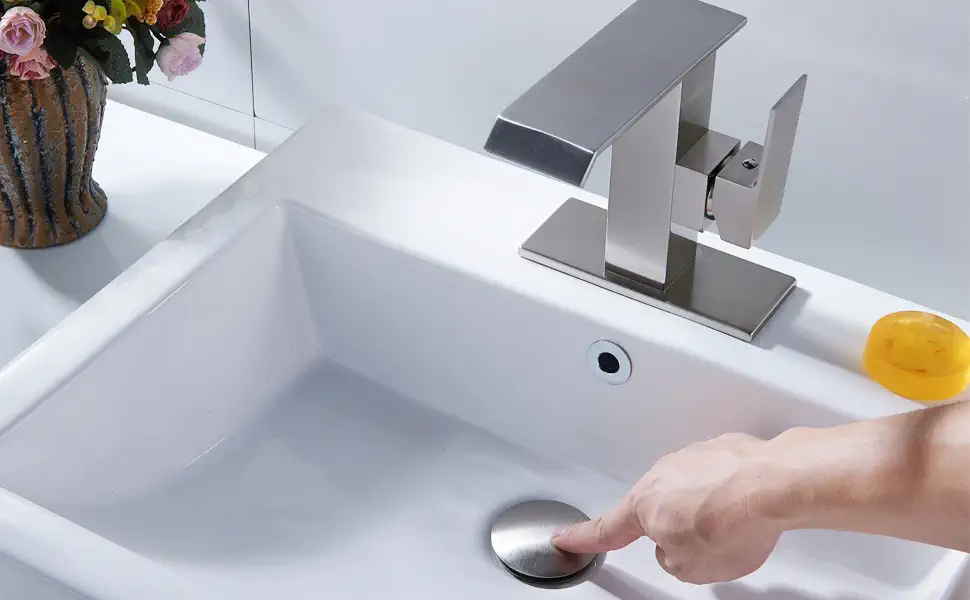
1. Pressure drainpipe
Although ram drains look better, ram drains are more likely to stick to some dirt and require the entire drain to be unscrewed for a thorough cleaning, which can be slightly more complicated to operate and not very convenient to use. If the drainer is unscrewed and then reinstalled, it may be loose and not secure.
2. Flip-down drains
Flap drains can be rotated at will to allow water to leak out of the basin. When the flip-flop drainer is used for a long time, the airtightness will decrease, resulting in the inability to hold water in the basin. Or there is no rotation; flipper type drainer has a simple structure, easy to clean and easy to replace.
3. Leak-type drains
Drain-type drains are also relatively simple in construction, similar to kitchen sinks. The disassembly and installation process for drain-type drains is slightly more complicated than that of push-pull drains and flap drains. Drain-type sink basins cannot store water unless they are closed with a seal.
Basin Sink Installation Steps
- First, take out the drain hose you bought and remove the lower part of the basin drain and the flange that holds the basin drain to the bottom of the basin. Be sure to tighten the flanges. Once tightened, you can place the basin on the countertop, with the end of the basin drain hose pointed at the opening in the countertop.
- Wrap some impermeable tape around the basin drain in its proper place and align the other end of the basin drain with the drain, which is the opening in the sewer line. Remove the parts and use a wrench to tighten the connection between the drain pipe and the sewer line. After installation, check that the ends of the basin drain pipe are evenly adjusted and tightened.
- Check that there are no parts or squashed during the installation.4. After checking that it is correct, start testing the water resistance of the basin. From the side, you can see if there is any leakage in the sink. If there are no leaks or seepage, it means that the water pipe under the basin has been installed, otherwise it needs to be checked again or reinstalled.
More:gooseneck kitchen faucetn
How to Install a Bathroom Sink Drain: Step-by-Step Guide
Installing a bathroom sink drain is a straightforward job that most homeowners can finish in under an hour. A bathroom drain installation involves connecting the drain body to the sink, adding the P-trap, and connecting the trap to the wall drain pipe.
Tools and supplies you need
- New bathroom sink drain kit
- Plumber’s putty or silicone sealant
- Adjustable pliers or a basin wrench
- Channel-lock pliers
- Bucket or towel
Step 1: Remove the old drain
Place a bucket under the sink, then loosen the slip nuts on the P-trap with pliers and remove the trap. Unscrew the lock nut that holds the old drain body to the sink, then push the old drain up and out from above.
Step 2: Install the new drain body
Roll a thin rope of plumber’s putty and press it around the underside of the new drain flange. Drop the drain body into the sink hole from above, then from under the sink, slide on the rubber gasket and friction washer, and tighten the lock nut by hand before giving it a final snug turn with pliers. Wipe away any excess putty that squeezes out around the flange.
Step 3: Connect the P-trap
Connect the tailpiece to the bottom of the drain body, then fit the P-trap onto the tailpiece. Align the trap arm with the wall drain pipe, then tighten each slip nut until snug. Make sure the trap arm slopes slightly downward toward the wall so water drains properly.
Step 4: Test for leaks
Turn the water on and let it run for a minute. Watch every connection, including the drain flange, tailpiece, and P-trap, for drips. If you see a leak, tighten the slip nut slightly or remove and reseat the part with fresh plumber’s putty.
Bathroom Drain Installation Tips and Common Mistakes
Do not overtighten the drain flange. Hand-tighten the lock nut first, then turn it only a quarter to half turn more with pliers. Overtightening can crack a plastic drain body or the sink itself.
Always use plumber’s putty or silicone under the flange. Skipping the sealant is the most common reason a new sink drain leaks from the top. For sinks with a built-in overflow, make sure the drain kit is designed for an overflow sink so the overflow channel stays open.
If the wall pipe is metal and the P-trap is plastic, use a slip-joint washer to make a reliable seal. Avoid forcing mismatched threads together, which can strip the fitting and cause a hidden leak.
Related Guides
n
- n
- What Is The Standard Kitchen Sink Drain Size
- Sink Draining Slowly No Blockage? Here”s 7 Ways to Fix It!
- What Is The Standard Drain Size for Bathroom and Kitchen Sink
n
n
n
n