 WOWOW Faucets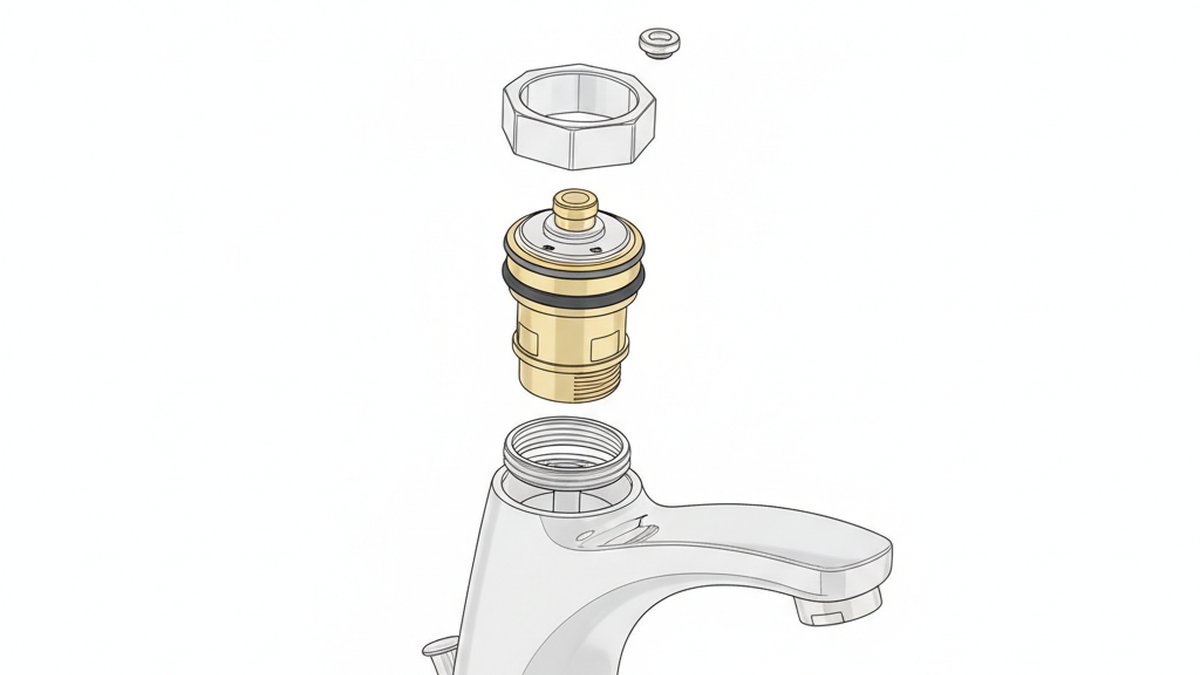
A delta faucet cartridge replacement single handle job is one of the most satisfying DIY plumbing repairs you can do, because it fixes the two most common faucet complaints at once: a drip that won’t quit and a handle that no longer controls temperature or flow the way it should. The cartridge is the small plastic-and-rubber valve buried inside the faucet body that mixes hot and cold and turns the water on and off. When it wears out, you get drips, spitting, stiff handles, or water that won’t get hot. The good news? On almost every single-handle Delta, you can swap it yourself in under half an hour, and the part usually costs $15–$40.
Below, we walk through exactly how to do it — which cartridge you actually need, the step-by-step removal and install, the mistakes that cause leaks afterward, and when it’s smarter to just replace the whole faucet. This guide applies to both single-handle kitchen faucets and single-handle bathroom and tub/shower valves, because the mechanism is nearly identical.
How do I know if my single-handle Delta faucet needs a new cartridge or a whole new faucet?
If the faucet body is solid and only the water behavior is wrong — dripping, low or uneven flow, hard-to-turn handle, or no hot water — you almost certainly just need a new cartridge, not a new faucet. Replace the entire faucet only when the base is corroded, the spout is cracked, the finish is peeling badly, or the mounting is loose beyond tightening.
Here’s the simple test: run the faucet and watch what fails. A cartridge is the culprit when you see any of these:
- Constant drip from the spout even with the handle fully off — worn internal seals.
- Handle is stiff, gritty, or won’t move smoothly — mineral buildup or a scored cartridge.
- Water won’t reach full hot or full cold — the cartridge’s mixing ports are worn or clogged.
- Sputtering or reduced flow that doesn’t clear when you clean the aerator.
- A leak at the base of the handle when the water is running — often a cartridge O-ring or seal, sometimes just a loose bonnet nut.
If instead the faucet wobbles at the deck, the finish is flaking, or you simply want a new look, a cartridge won’t save you — plan a full swap. Not sure which camp you’re in? Our deeper explainer on what the cartridge on a kitchen faucet actually does helps you diagnose it in a couple of minutes.
Which Delta cartridge do I actually need for my single-handle faucet?
The right cartridge depends on the faucet’s internal design, not a model name printed nowhere on the outside — so identify it by the stem/cartridge type. Delta single-handle faucets use a handful of well-known cartridges, and matching the correct one is the single most important step of the whole job.
Delta broadly uses two families in single-handle faucets: the classic ball-valve style (the original Delta design, using a rotating ball with seats and springs) and the more modern ceramic or plastic cartridge style. Most single-handle Delta kitchen and lavatory faucets made in the last 15+ years use a cartridge you can pull straight up and out. Here’s how the common options compare:
| Cartridge / Valve Type | Found On | Typical Cost | Best For |
|---|---|---|---|
| Delta RP19804 (ball assembly) | Classic single-handle ball faucets | $12–$25 | Older kitchen/bath faucets that drip |
| Delta RP46074 / RP50587 (cartridge) | Many modern single-handle lavatory faucets | $20–$40 | Newer bathroom sink faucets |
| Delta RP47201 (MultiChoice tub/shower) | Single-handle shower/tub valves | $25–$45 | Shower valve drip / temp problems |
| Universal-fit ceramic cartridge | Various single-handle faucets | $10–$20 | Budget repairs when OEM is unavailable |
Three foolproof ways to get the exact match: (1) find the model or series number on the original paperwork or under the faucet, (2) pull the old cartridge first and take it to the store to match physically, or (3) look up the faucet by the shape of the handle and spout on Delta’s parts finder. When in doubt, remove the old part before buying — it removes all guesswork. For the mechanics of the swap itself, our general how to replace a faucet cartridge guide pairs nicely with this Delta-specific walkthrough.
What tools and parts do I need before I start?
You need surprisingly little: an Allen (hex) wrench, a Phillips or flathead screwdriver, channel-lock or needle-nose pliers, plumber’s grease, white vinegar, and the correct replacement cartridge. Total spend beyond the cartridge is usually zero if you already own basic hand tools.
Here’s the full checklist so you only make one trip:
- Replacement Delta cartridge — the correct type for your faucet (see the table above).
- Allen/hex wrench set — most Delta handles use a small set screw hidden under a cap or behind the handle.
- Channel-lock pliers — to grip and pull the cartridge, and to loosen the bonnet nut.
- Flathead + Phillips screwdrivers — for handle caps and any retaining screws.
- Plumber’s grease (silicone) — to lubricate O-rings so the new cartridge seats smoothly and lasts longer.
- White vinegar + old toothbrush — to dissolve mineral scale inside the valve body before installing.
- A rag and a small bucket — to plug the drain (so screws don’t fall in) and catch residual water.
Pro tip: stuff the rag into the sink drain before you start. The number one heartbreak in this job is a tiny set screw disappearing down the drain. If you’re stocking a repair kit anyway, our roundup of the best faucet accessories of 2026 covers the cartridges, O-ring kits, and aerators worth keeping on hand.
How do you replace a single-handle Delta faucet cartridge step by step?
Replace it in seven steps: shut off the water, remove the handle, remove the bonnet/retaining nut, pull the old cartridge, clean the housing, install the new cartridge in the same orientation, and reassemble. The whole delta faucet cartridge replacement single handle process takes 20–30 minutes for a first-timer.
Step 1 — Shut off the water and open the faucet
Turn off both hot and cold supply valves under the sink (turn clockwise until they stop). No shutoffs under the sink? Close the home’s main water valve. Then open the faucet handle to release pressure and drain the lines. Confirm the water is truly off before going further — this one step prevents a soaked cabinet.
Step 2 — Remove the handle
Look for a set screw. On most single-handle Delta faucets it’s hidden under a decorative cap (pop it off with a flathead) or on the underside/back of the handle. Loosen it with your Allen wrench — you usually don’t need to fully remove it — then lift the handle straight up and off. If it’s stuck from mineral buildup, wiggle gently; never pry hard against the finish.
Step 3 — Remove the bonnet nut or retaining clip
Under the handle you’ll see a dome-shaped bonnet nut, a retaining nut, or a small U-shaped metal clip. Unthread the nut counterclockwise with channel-locks (wrap the jaws in tape to protect the finish), or pull the clip straight out with needle-nose pliers. Keep track of the order of any washers or springs — take a phone photo before you disassemble anything.
Step 4 — Pull the old cartridge
Grip the top of the cartridge with pliers and pull straight up while gently twisting to break the mineral seal. On ball-style faucets, lift out the ball, then the rubber seats and springs beneath. Cartridges can be stubborn — if it won’t budge, a Delta cartridge puller tool (a few dollars) makes it effortless. Note the orientation: many cartridges have a flat side or tab that must line up on reinstall.
Step 5 — Clean the valve housing
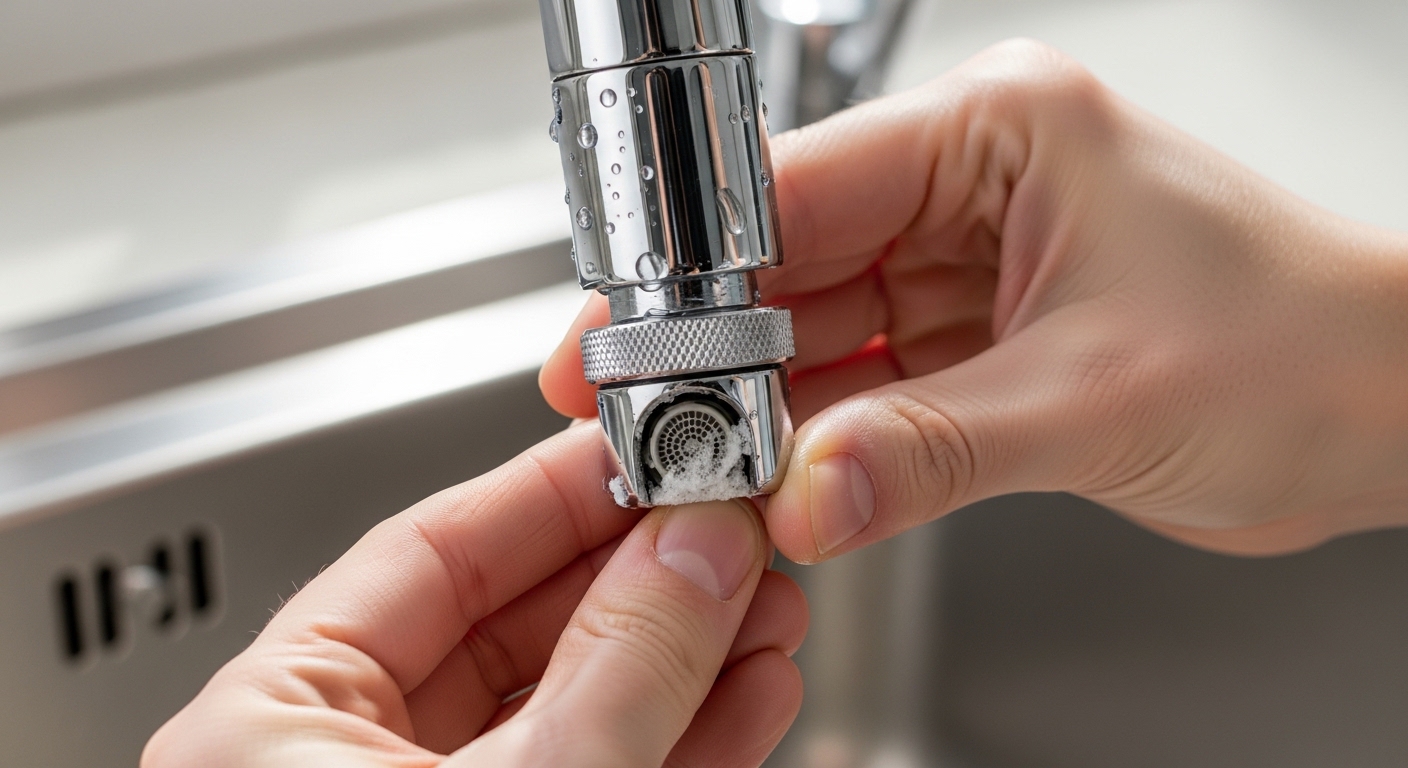
Wipe out the housing and soak away any mineral scale with white vinegar on a rag or an old toothbrush. Clean seats and threads mean the new cartridge seals properly and turns smoothly. Skipping this is why some people install a new cartridge and still get drips — grit under the seals ruins the seal.
Step 6 — Install the new cartridge
Smear a thin film of silicone plumber’s grease on the O-rings, then push the new cartridge straight down into the housing in the correct orientation (match that flat/tab you noted). It should seat fully and evenly — no rocking. Replace any springs, seats, clip, or bonnet nut in reverse order, snugging the nut hand-tight plus a slight turn with pliers. Don’t over-tighten; that cracks plastic parts.
Step 7 — Reattach the handle and test
Slide the handle back on, tighten the set screw, and re-cap it. Turn the supply valves back on slowly, then run the faucet through hot, cold, and off. Check under the handle and under the sink for any weeping. A drip-free spout and a smooth, quiet handle mean you nailed it.
Why is my Delta faucet still dripping after I replaced the cartridge?
If it still drips after a cartridge swap, the usual culprits are a mismatched cartridge, worn rubber seats and springs left in place (on ball-style faucets), debris under the new seals, or a bonnet nut that’s too loose or too tight. Nine times out of ten it’s one of those four, not a defective new part.
Work through them in order:
- Wrong cartridge: a “close enough” universal part may not seal against your specific seats. Verify it’s the correct Delta type.
- Old seats & springs: on classic Delta ball faucets, the little rubber seats and springs under the ball wear out too. Replace them as a set — they’re a couple of dollars — whenever you service the valve.
- Debris under the seal: even a grain of grit or a shred of old O-ring keeps the valve from closing. Pull it, re-clean, reinstall.
- Bonnet nut tension: too loose leaks around the handle; too tight distorts the cartridge. Snug plus a slight turn is right.
- Damaged O-rings on install: dry O-rings can pinch or tear going in. Always grease them first.
If you’ve checked all five and it still drips, the valve body seats may be pitted beyond cleaning — at that point a new faucet is the better long-term fix. For a full sink swap, our step-by-step guide to replacing a bathroom faucet takes you from old-faucet removal to the final leak test.
How long does a Delta faucet cartridge last, and how do I make it last longer?
A quality Delta cartridge typically lasts 5–10 years, and often longer, before it needs replacing — but hard water is the great accelerator, cutting that lifespan roughly in half in mineral-heavy areas. You can stretch it by managing scale and using the handle gently.
What actually extends cartridge life:
- Address hard water. Mineral scale is the No. 1 killer of cartridges. A whole-home softener or even regular aerator cleaning slows buildup.
- Don’t crank the handle shut. Firm is enough; slamming it off grinds the seals faster.
- Flush new plumbing before use. Construction debris and sediment score the cartridge on day one — run lines clear before the faucet is in service.
- Use silicone grease at every service. Lubricated O-rings resist tearing and drying out.
- Fix small drips early. A minor drip means the seal is already failing; addressing it promptly prevents a worn valve body.
One more reassurance: most Delta faucets carry a lifetime limited warranty on the faucet and its finish, and Delta will often send replacement functional parts like cartridges free to the original homeowner. It’s worth a five-minute call before you buy — keep your proof of purchase handy.
Single-handle vs. two-handle cartridge repair: what’s the difference?
A single-handle faucet has one cartridge that mixes hot and cold, so you do the job once; a two-handle faucet has a separate cartridge (or stem) under each handle, so you typically service them in pairs. The single-handle repair is simpler and faster, but the cartridge is a bit more complex internally because it handles both temperature and volume.
Here’s the practical comparison:
| Factor | Single-Handle | Two-Handle |
|---|---|---|
| Number of cartridges | One (mixing) | Two (hot + cold stems) |
| Typical repair time | 20–30 min | 30–45 min (both sides) |
| Diagnosing the leak | One valve to check | Identify which side drips first |
| Part cost | $15–$40 (one part) | $10–$30 (often replace both) |
Either way the core moves are the same — shut off water, remove handle, pull the old valve, clean, install new, test. If your leak is at a two-handle faucet, just repeat these steps on each side. The mechanism families overlap heavily across kitchen, bath, and tub fixtures, which is why learning it once pays off everywhere in the house.
About the Author & Why Trust WOWOW Faucet
Author note: This guide was written by the WOWOW Faucet product and repair team, drawing on hands-on servicing of hundreds of single-handle kitchen, bath, and shower faucets across ball-valve and ceramic-cartridge designs. We’ve pulled stuck cartridges, chased phantom drips, and matched parts across dozens of models, so the tips here reflect what actually goes wrong on a real sink — not just theory.
Brand credibility: WOWOW is a dedicated faucet and bathroom-fixtures manufacturer focused on kitchen faucets, bath faucets, shower systems, and fixture accessories. Our faucets are built with ceramic-disc cartridges rated for extended open/close cycle testing and are certified to meet U.S. plumbing standards, including lead-free compliance under the NSF/ANSI 61 & 372 frameworks, and our fixtures carry manufacturer warranty coverage on the faucet body and finish. We pressure- and cycle-test cartridges for durability so the parts you install hold up in daily use. When you need a replacement part or a full fixture upgrade, you can browse guides and products at www.wowowfaucet.com.
FAQ
Can I replace a Delta cartridge without turning off the main water?
Yes, if your sink has working hot and cold shutoff valves underneath — just close those two. Only shut the home’s main valve if the under-sink shutoffs are missing, seized, or leaking. Always open the faucet afterward to relieve pressure before you disassemble anything.
How much does it cost to replace a single-handle Delta cartridge?
The DIY cost is just the part — usually $15–$40 for a genuine Delta cartridge, or $10–$20 for a universal-fit one. If you hire a plumber, expect roughly $100–$200 total including labor. Since the repair is beginner-friendly, doing it yourself saves the most.
Do I need a Delta cartridge puller tool?
Not always, but it helps. If the cartridge lifts out with pliers, you’re fine. For cartridges cemented in place by years of mineral scale, an inexpensive Delta puller tool ($5–$15) removes it cleanly without damaging the valve body — a worthwhile buy for stubborn or older faucets.
Are Delta cartridges universal across all single-handle faucets?
No. Delta uses several cartridge and valve designs, and they are not interchangeable. Match the exact type for your faucet by pulling the old cartridge first, checking your model number, or using Delta’s parts finder. Installing the wrong one is the most common cause of post-repair drips.
Why is my single-handle faucet hard to turn after replacing the cartridge?
Usually it’s a lack of lubrication or an over-tightened bonnet nut. Remove the handle, back the retaining nut off slightly, and confirm the O-rings are greased with silicone plumber’s grease. A cartridge that’s cross-seated or the wrong model can also bind, so double-check orientation and fit.
Can I use this same method on my single-handle shower or tub valve?
Largely yes. Single-handle shower and tub valves (like Delta’s MultiChoice) use the same shut-off, remove-handle, pull-cartridge sequence, but you’ll remove a trim plate and sometimes a retaining clip instead of a bonnet nut. The cartridge is a different part number, so match it specifically to your shower valve before buying.