 WOWOW Faucets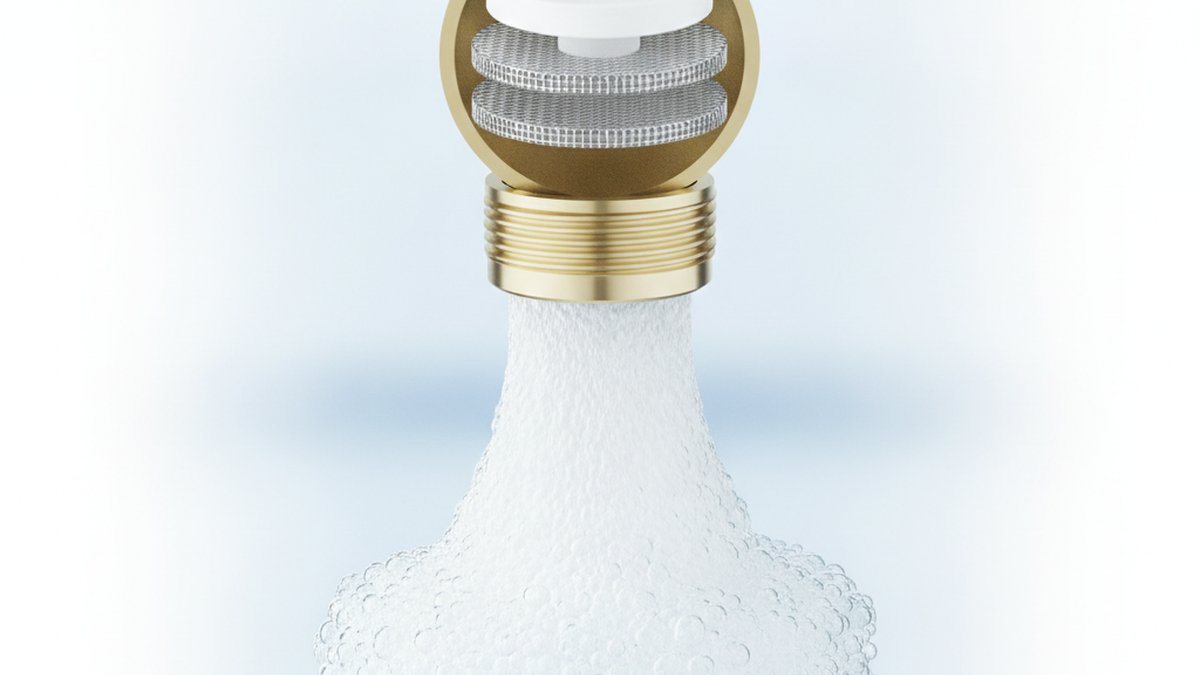
A faucet aerator with flow restrictor is a small screw-on insert that mixes air into your water stream while capping the maximum flow rate (measured in gallons per minute, or GPM). You get a soft, splash-free stream that still feels strong, but you’re moving far less water through the tap. It’s a $5–$15 part, it installs in under two minutes with your bare hands, and it’s the single highest-return upgrade on any faucet. This guide walks through how it works, how to pick the right GPM and thread size, how it compares to a plain aerator, and how to install it — so you buy once and buy right.
What exactly does a flow restrictor do inside the aerator?
It physically limits how much water can pass through, no matter how far you crank the handle. Inside the aerator housing sits a small flexible rubber or silicone disc with a precise opening. As water pressure rises, the disc flexes and narrows the gap, holding the output to a fixed GPM. So whether your home runs at 45 PSI or 80 PSI, a 1.5 GPM restrictor still delivers right around 1.5 gallons per minute.
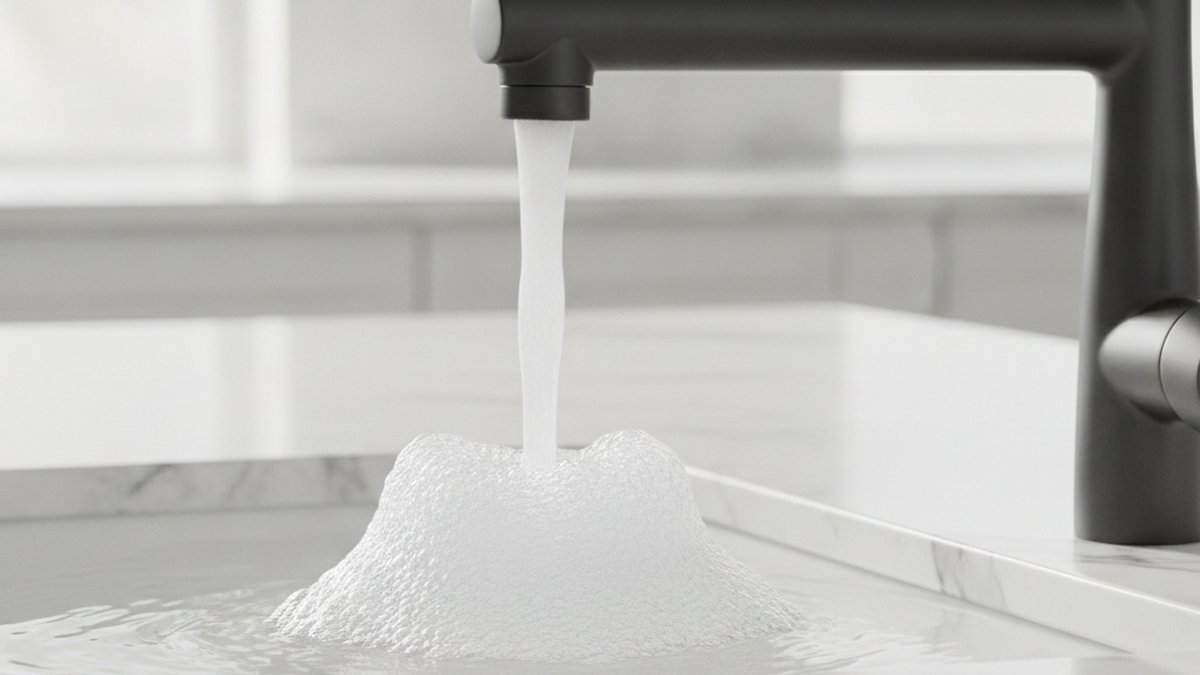
That’s the part people misunderstand: the restrictor manages volume, while the aerator screen manages feel. The mesh screen breaks the water into many small streams and pulls in air, so the reduced flow doesn’t feel weak or needle-thin — it feels full and soft. Put the two together and you get the holy grail: less water, same perceived pressure. Without the aerator, a bare restrictor would feel like a sad trickle. Without the restrictor, a plain aerator just softens whatever volume your plumbing throws at it.
- Flow restrictor: caps max GPM, independent of house pressure.
- Aerator screen: adds air, softens the stream, cuts splashing.
- Housing + washer: threads onto the spout and seals against leaks.
Is a faucet aerator with flow restrictor actually worth it, or just hype?
It’s worth it for almost everyone — the math is hard to argue with. A standard older bathroom faucet runs 2.2 GPM; dropping to a 1.0 GPM aerator cuts that tap’s water use by more than half. A family of four brushing teeth, washing hands, and rinsing can easily save 500–700 gallons a month on bathroom sinks alone, and since much of that is heated water, you’re trimming the water heating bill too.
Here’s the honest catch: it’s not worth it in two situations. First, if you specifically need to fill pots or buckets fast at the kitchen sink, a very low restrictor (1.0 GPM) will frustrate you — size up to 1.8–2.2 GPM instead. Second, if your home already suffers from genuinely low supply pressure, adding a tight restrictor on top can make a bad situation worse. In that case, diagnose the pressure problem first; our guide on what to do when your kitchen faucet has low water flow walks through the usual culprits before you blame the aerator.
For the vast majority of households — city water, normal 40–80 PSI, everyday hand-washing and rinsing — a flow-restricting aerator is one of the best few dollars you’ll ever spend on your plumbing.
What GPM should you choose for a bathroom vs. a kitchen faucet?
Match the GPM to the job: go low in the bathroom, moderate in the kitchen. Bathroom sinks are used for quick, low-volume tasks — washing hands, brushing teeth, rinsing a razor — so you can go as low as 0.5–1.0 GPM and barely notice. Kitchen faucets fill pots, rinse produce, and wash dishes, so cutting too aggressively gets annoying; 1.5–2.2 GPM keeps things practical while still saving water.
Federal standards cap new faucets at 2.2 GPM (kitchen) and most bathroom faucets at 1.2 GPM, and water-efficiency programs like EPA WaterSense certify bathroom aerators at 1.5 GPM or less. Here’s a practical cheat sheet:
| Flow rate (GPM) | Best for | Feel / trade-off |
|---|---|---|
| 0.5 GPM | Public/guest bathrooms, powder rooms | Very frugal; fine for hand-washing, slow for filling |
| 1.0 GPM | Everyday bathroom sinks | Big savings, still comfortable for daily use |
| 1.5 GPM | Busy bathroom or light kitchen use | WaterSense sweet spot; strong feel, good savings |
| 1.8 GPM | Main kitchen faucets | Balanced — rinses and fills without dragging |
| 2.2 GPM | Pot-filling, high-volume kitchens | Fastest fill, smallest savings |
If you’re buying a new tap rather than retrofitting, flow rate is a spec worth checking on the box — it’s the same number people obsess over when they compare models, like in our breakdown of the Hansgrohe Cento kitchen faucet flow rate for busy kitchens.
How do you know which size and thread your faucet needs?
You need to know two things: thread gender (male or female) and thread size. Most North American faucets use one of two standards — male 15/16″–27 (threads on the outside of the spout) or female 55/64″–27 (threads on the inside). A quick way to tell without measuring: if the old aerator screws into the spout, you need a male aerator; if it screws onto the outside, you need a female one.
There’s also a smaller “junior” size common on bathroom faucets and a few European metric sizes (M22, M24). If you’re unsure, the easiest move is to unscrew the existing aerator (turn counterclockwise, cushion it with a cloth so you don’t scratch the finish) and bring it to the store, or buy a universal/dual-thread kit that fits both common sizes with an included adapter.
- Unscrew the current aerator by hand or with cloth-wrapped pliers.
- Look at where the threads sit — inside (female spout, needs male aerator) or outside (male spout, needs female aerator).
- Measure the diameter if you can, or match it to a package labeled “regular male 15/16” or “regular female 55/64”.
- When in doubt, grab a dual-thread kit with an adapter to cover both.
Plain aerator vs. flow-restricting aerator vs. no aerator — what’s the difference?
The difference is control. No aerator gives you a hard, splashy, high-volume stream and wastes water. A plain aerator softens the stream and cuts splash but doesn’t cap volume. A flow-restricting aerator does both — soft stream and a hard ceiling on GPM. For almost any home that cares about the water bill, the restricting version wins.
| Type | Splash control | Caps water use? | Typical GPM | Best for |
|---|---|---|---|---|
| No aerator | Poor | No | 2.5+ | Fast bucket fills only |
| Plain aerator | Good | No | Matches supply | Softer feel, no savings goal |
| Flow-restricting aerator | Good | Yes | 0.5–2.2 | Saving water + money |
One more decision people love to overthink: finish. Aerators come in chrome, brushed nickel, matte black, and bronze to match the faucet. The water doesn’t care, but if the aerator face is visible on a modern tap, matching matters cosmetically — we go deep on that in whether a matte black faucet aerator is worth buying. For most faucets the aerator tucks up inside the spout and nobody ever sees it, so function should drive the choice.
How do you install a faucet aerator with flow restrictor yourself?
You can do it in under two minutes with no tools in most cases — just your hand and maybe a rag. Turn the aerator counterclockwise to remove the old one, clean the spout threads, drop in the new aerator with its rubber washer seated, and hand-tighten clockwise. Run the water to check for drips around the edge; a slow seep means the washer isn’t seated or you cross-threaded it.
- Remove the old aerator. Twist counterclockwise by hand. If it’s stuck from mineral buildup, wrap it in a cloth and use pliers gently — never bare metal on the finish.
- Clean the threads. Wipe away grit and old sediment. If there’s crusty white scale, soak the spout tip in vinegar for 10 minutes.
- Check the washer. The new aerator comes with a rubber or silicone washer — make sure it’s seated flat inside, not folded.
- Hand-tighten clockwise. Snug is enough. Over-tightening crushes the washer and causes leaks, not fewer.
- Test. Run hot and cold. No drips at the rim, soft even stream, no sideways spray = done right.
If you turn it on and the flow seems weirdly weak even for a restrictor, pull it back off and check the screen for debris — new plumbing work and old pipes both shed sediment that clogs the fine mesh. A quick rinse usually fixes it. And if low flow is a chronic, whole-faucet problem rather than an aerator issue, it may be the cartridge or supply lines instead; this ties into the same diagnostics we cover for a chrome drinking faucet at the kitchen sink where clean, steady flow is the whole point.
Will a flow restrictor hurt my water pressure or feel weak?
No — a good aerator preserves perceived pressure even as it cuts volume, and that’s the entire point of the design. Pressure (PSI) and flow (GPM) are different things. The restrictor lowers GPM, but the aerator’s air injection keeps the stream feeling firm and full. In practice, most people can’t tell a 1.5 GPM aerated stream from a 2.2 GPM one during normal hand-washing.
Where you will notice is bulk tasks: filling a stockpot, a watering can, or a bathtub-sized bucket takes proportionally longer at lower GPM. If that’s a daily frustration, keep a higher-GPM aerator on the kitchen tap and save the aggressive restrictors for bathrooms. The same “high pressure feel from low flow” principle shows up in showers too — see how to get high pressure from a low GPM shower head, which uses the exact same air-injection trick at a larger scale.
How much money and water does it actually save?
Expect to save hundreds to over a thousand gallons per faucet per year, and the part pays for itself in weeks. Swapping a 2.2 GPM bathroom aerator for a 1.0 GPM one cuts that faucet’s water use by about 55%. For a typical household, EPA estimates WaterSense-labeled bathroom faucets and aerators save around 700 gallons of water per year per home just on bathroom sinks — and because you heat a big share of that water, you also shave the energy bill.
Run the numbers on a single bathroom tap used ~8 minutes a day:
- At 2.2 GPM: ~17.6 gallons/day → ~6,400 gallons/year.
- At 1.0 GPM: ~8 gallons/day → ~2,900 gallons/year.
- Savings: ~3,500 gallons/year on one faucet, for a ~$6 part.
Multiply across every sink in the house and the payback is almost immediate. There’s no other plumbing upgrade with this return-on-investment.
FAQ
Can I add a flow restrictor to any faucet?
Almost any faucet with a removable aerator can take a flow-restricting one — that covers the vast majority of standard kitchen and bathroom taps. The exceptions are a handful of designer faucets with hidden, non-standard, or laser-cut outlets that don’t accept screw-in aerators. Check whether your current aerator unscrews; if it does, you’re good.
How often should I replace or clean the aerator?
Clean it every 3–6 months if you have hard water, once a year otherwise. Unscrew it, soak the screen and restrictor disc in white vinegar for 15–30 minutes to dissolve mineral scale, rinse, and reinstall. Replace the whole aerator every few years, or sooner if the screen tears or the disc hardens and the flow gets uneven.
Why is my faucet spraying sideways after I installed a new aerator?
Sideways spray almost always means debris is caught in the screen or the washer isn’t seated flat. Unscrew the aerator, rinse the mesh under running water to clear grit, and make sure the rubber washer sits flush before hand-tightening again. Cross-threading or overtightening can also distort the seal and cause spray.
Is a WaterSense aerator worth paying extra for?
Usually yes. WaterSense-labeled aerators are independently certified to use 1.5 GPM or less while still meeting minimum performance standards, so you’re guaranteed real savings without a weak stream. The price difference over a generic aerator is typically a dollar or two — a trivial premium for verified performance.
Does a flow restrictor reduce my water pressure throughout the house?
No. An aerator only affects the single faucet it’s screwed onto — it does nothing to the pressure or flow at any other tap, your shower, or your appliances. If every faucet in the house feels weak, the problem is your main supply pressure or a pressure regulator, not an aerator.
Male or female threads — how do I avoid buying the wrong one?
Unscrew your old aerator and look at where the threads are. Threads on the inside of the spout mean you need a male-threaded aerator (regular size 15/16″–27); threads on the outside mean you need a female-threaded one (55/64″–27). If you can’t tell, buy a dual-thread kit with an adapter — it fits both common standards.
The bottom line
A faucet aerator with flow restrictor is the rare upgrade that’s cheap, tool-free, and genuinely pays off — lower water bills, lower heating costs, and a stream that still feels great. Match the GPM to the room, confirm your thread size, hand-tighten it in, and you’re done. For most homes, outfitting every faucet costs less than a pizza and saves thousands of gallons a year.
About the author: This guide was written by the WOWOW Faucet product team, drawing on hands-on bench testing of aerators across chrome, brushed nickel, and matte black finishes at pressures from 40–80 PSI. About WOWOW: WOWOW designs and sells kitchen and bathroom faucets and fixtures engineered to meet U.S. flow standards, with WaterSense-aligned aerator options, cUPC/NSF-reviewed components, and a limited lifetime warranty on finish and function. We test every aerator spec against its labeled GPM before it ships.