 WOWOW Faucets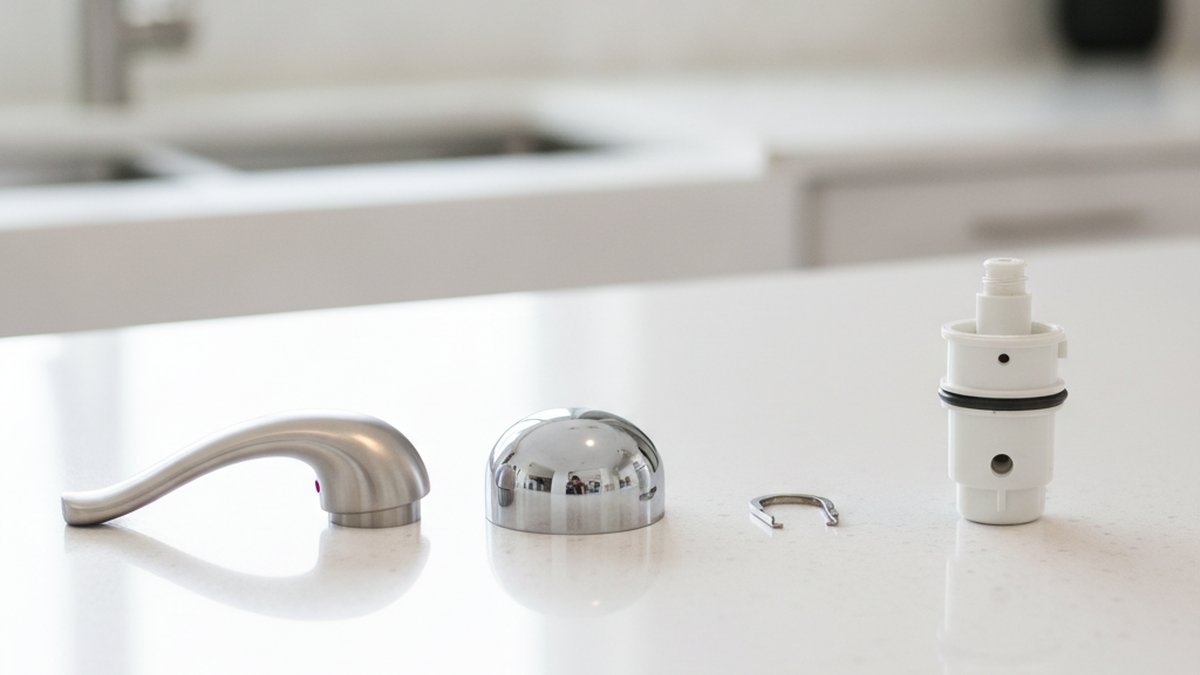
Learning how to replace cartridge in kitchen faucet setups is the single most useful faucet repair you can teach yourself, because a worn cartridge is behind the vast majority of drips, stiff handles, and temperature problems — not the whole faucet. The cartridge is the small valve core inside the faucet body that controls how much hot and cold water mixes and how fast it flows. When it wears out, replacing that one $10–$40 part usually fixes the leak completely, and you avoid a $150+ plumber visit or buying a brand-new faucet you don’t need.
Below is a plain-English, start-to-finish walkthrough written the way a knowledgeable friend would explain it standing at your sink — including the mistakes that trip people up, how to identify the right part, and when to actually call a pro.
What actually is the cartridge, and how do I know it’s the problem?
The cartridge is the replaceable valve core inside the faucet that mixes hot and cold water and shuts flow on and off. If your faucet drips after you turn it off, the handle feels gritty or hard to move, water won’t get hot or cold, or pressure has dropped for no reason, the cartridge is almost always the culprit. These are wear symptoms — internal seals and ceramic discs degrade over 5–10 years, faster with hard water.
Before you tear anything apart, rule out the two cheap fixes: a clogged aerator (unscrew the tip, rinse the screen) and loose connections under the sink. If cleaning the aerator restores flow, you’re done. If the drip or temperature issue persists, it’s the cartridge. If you want a deeper primer on the part itself before you start, our guide on what the cartridge on a kitchen faucet is and why it matters breaks down ceramic-disc versus ball and compression designs.
How do I tell if it’s the cartridge or a bad O-ring?
Quick rule: if water drips from the spout, it’s the cartridge; if water leaks around the base of the spout when it swivels, it’s usually the O-rings. Spout drips mean the internal seal isn’t shutting off water — that’s a cartridge job. Base leaks and puddles around the collar mean the large O-rings under the spout are cracked, which you can swap in the same teardown for a couple of dollars. Many people replace both at once while they’re in there.
What tools and parts do I need to replace a kitchen faucet cartridge?
You need very little: an adjustable wrench, a set of hex/Allen keys, needle-nose pliers, and the correct replacement cartridge. That’s genuinely it for 90% of faucets. A few extras make the job smoother, especially if the old cartridge is stuck.
- Adjustable wrench or channel-lock pliers — for the retaining nut on some models.
- Hex/Allen key set — most single-handle kitchen faucets hide the handle set screw under the lever or behind a small cap.
- Needle-nose pliers — for pulling the horseshoe-shaped retaining clip.
- Flat screwdriver — to pry off the decorative index cap (the red/blue button).
- Plumber’s grease (silicone) — lubricate the new cartridge O-rings so they seat without tearing.
- White vinegar + old toothbrush — to clean mineral scale out of the valve body.
- A cartridge puller — a $10–$15 tool, only if the old cartridge is seized (common on 8+ year-old faucets with hard water).
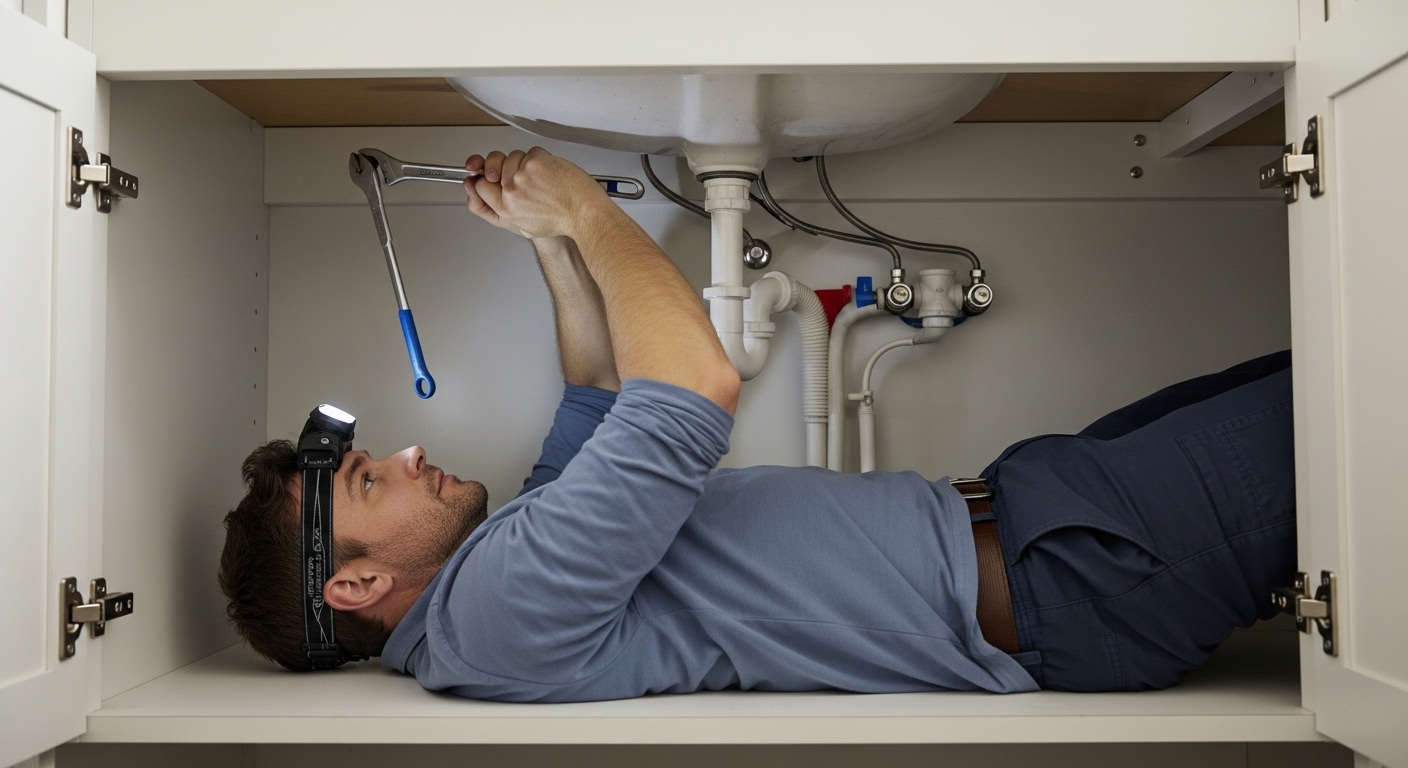
- A rag and a small bucket — to plug the drain and catch residual water.
The most important “tool” is the exact replacement cartridge. This is where DIY jobs succeed or fail — see the identification section below.
How do I actually replace the cartridge, step by step?
Here’s the full sequence. Shut off the water first, then work from the top down: handle, cap, clip, cartridge, then reverse to reassemble. Most single-handle kitchen faucets follow this exact pattern regardless of brand.
- Shut off the water. Turn the hot and cold shutoff valves under the sink fully clockwise. Then open the faucet handle to release pressure and drain the line. Plug the drain with a rag so no small parts vanish.
- Remove the handle. Pop off the decorative index cap with a flat screwdriver, then loosen the set screw with the matching hex key (usually 3/32″ or 7/64″). Lift the handle straight up and off.
- Remove the cover/dome and any retaining piece. Unscrew the decorative dome or bonnet nut by hand or with channel-locks wrapped in tape to avoid scratches. You’ll now see the top of the cartridge.
- Pull the retaining clip or nut. Many cartridges are held by a small U-shaped brass or plastic clip — grip it with needle-nose pliers and pull it straight out. Others use a threaded retaining nut you unscrew with a wrench.
- Extract the old cartridge. Grip the stem with pliers and pull straight up while wiggling gently. Note the orientation first — most cartridges have a flat, notch, or tab that must face a specific direction (usually forward). Snap a phone photo before it comes out. If it’s seized, use a cartridge puller rather than forcing it.
- Clean the valve body. Wipe the inside of the housing and scrub away mineral scale with vinegar and a toothbrush. A clean bore lets the new cartridge seat evenly and seal.
- Insert the new cartridge. Lightly grease the O-rings with silicone plumber’s grease, then push it in with the tab/notch in the same orientation as the old one. It should drop in flush; never hammer it.
- Reassemble in reverse. Reinstall the retaining clip/nut, dome, handle, set screw, and index cap.
- Turn water back on slowly and test. Open the shutoffs, run hot and cold, and check that the drip is gone and the handle moves smoothly.
If you’d like a second walkthrough with more photos and variations for bathroom valves too, our step-by-step faucet cartridge replacement guide covers the same process across faucet types. Delta owners should also check the brand-specific quirks in our Delta single-handle cartridge replacement walkthrough, since Delta uses a distinctive multi-port cartridge.
What’s the one mistake beginners make most?
Installing the new cartridge in the wrong orientation. If you reverse it, your hot and cold will be swapped — left gives cold, right gives hot — or the handle will feel backwards. Always photograph the old cartridge before removal and match the flat/tab exactly. The second most common mistake is not fully seating the cartridge, which causes leaks; push firmly until it’s flush and the retaining clip slides in without force.
How do I find the exact right replacement cartridge for my faucet?
Match the cartridge by brand and model number, not by looks — many cartridges look nearly identical but differ by a few millimeters or a keyway shape. The most reliable method is to find the faucet’s model number (often stamped under the spout, on the supply lines, or on your original paperwork) and search the manufacturer’s replacement part number. The second-best method is to bring the old cartridge to the store and match it physically.
| Cartridge type | How it feels/works | Typical lifespan | Rough cost |
|---|---|---|---|
| Ceramic disc | Smooth quarter-turn; most modern single-handle faucets | 10–20 years | $15–$40 |
| Ball valve | Single lever, many small parts/springs inside | 5–10 years | $15–$30 |
| Cartridge (sleeve/stem) | Pull-out stem, common on two-handle faucets | 8–15 years | $10–$30 |
| Compression (rubber washer) | Older faucets; handle tightens down hard | Washer wears in 3–5 years | $5–$15 |
A few practical tips when buying: measure the old cartridge length and diameter, note the number of ports/holes, and count the splines on the stem. If your faucet is under warranty, many brands — including WOWOW — ship replacement cartridges free, so check before you pay. And if you’re weighing a repair against a full upgrade, our 2026 kitchen faucet buying guide helps you decide whether a 15-year-old faucet is worth saving.
Are all kitchen faucet cartridges interchangeable?
No — cartridges are brand- and often model-specific, and forcing a close-but-wrong part causes leaks or cross-threading. Ceramic-disc, ball, and compression designs are not interchangeable with each other, and even within one brand, cartridge dimensions change between product lines and years. Always match the manufacturer’s part number. When in doubt, the old cartridge in hand is your best reference at the store.
How much does it cost to replace a cartridge — DIY vs. hiring a plumber?
DIY costs just the price of the cartridge — usually $10–$40 — while a plumber typically charges $100–$250 for the same job, most of which is labor. Since the actual work takes under an hour and needs only basic tools, cartridge replacement is one of the highest-value DIY plumbing repairs you can do. The math strongly favors doing it yourself unless the faucet is seized, corroded into the deck, or you can’t reach the shutoffs.
- DIY: $10–$40 (cartridge) + $0–$15 (a puller tool if needed).
- Plumber: $100–$250 including labor and travel/minimum service fee.
- New faucet instead: $80–$400+ — only worth it if the body is cracked, badly corroded, or you want an upgrade.
If you’d rather compare local repair options first, our overview of finding faucet valve replacement nearby versus doing it yourself lays out when calling a pro genuinely makes sense.
When should I stop and call a professional instead?
Call a plumber if the shutoff valves won’t close, the cartridge is fused into a corroded valve body, the faucet base leaks from cracked brass, or you turn the water on and find a new leak you can’t stop. These signal problems beyond a simple part swap. A frozen cartridge that won’t budge even with a puller, or a valve body with stripped threads, means the repair has escalated past DIY territory and forcing it risks flooding the cabinet.
Also stop if you can’t identify the cartridge and no replacement seems to fit — a mismatched part will leak no matter how carefully you install it. There’s no shame in a pro visit here; the goal is a dry, working faucet, not a badge of honor.
FAQ
Do I have to turn off the main water supply to replace a cartridge?
No — you only need the two shutoff valves directly under the sink, turned fully clockwise. Then open the faucet to bleed off pressure. Only if those under-sink valves are missing or broken do you need the home’s main shutoff. Always confirm the water is truly off by opening the handle before you disassemble anything.
How long does a kitchen faucet cartridge last?
A quality ceramic-disc cartridge lasts 10–20 years; ball and older-style cartridges last closer to 5–10 years. Hard water shortens lifespan significantly because mineral scale scratches the ceramic discs and eats at seals. If you’re on well or hard water, expect the lower end of those ranges and consider a whole-house filter or softener to extend it.
Why is my faucet still dripping after I replaced the cartridge?
The most common causes are a wrong-fit cartridge, one not fully seated, debris left in the valve body, or damaged O-rings. Pull it back out, clean the housing thoroughly with vinegar, confirm the part number matches your model, grease the O-rings, and reseat it firmly until flush. If a correct, properly seated cartridge still drips, the valve body itself may be pitted or cracked.
Can I replace a cartridge without a special puller tool?
Usually yes — most cartridges pull out with needle-nose pliers and a gentle wiggle. A dedicated cartridge puller ($10–$15) is only necessary when the cartridge is seized from years of mineral buildup and won’t move. If yours resists, soak the area with white vinegar for 15 minutes to loosen scale before trying the puller, and never pry with excessive force against the valve body.
Is replacing a cartridge the same on a two-handle kitchen faucet?
The process is nearly identical, but you’ll have two separate cartridges — one under each handle — and they’re often “hot” and “cold” specific, so don’t mix them up. Replace both at the same time even if only one drips, since they wear at a similar rate. Two-handle models frequently use stem-style cartridges held by a retaining nut rather than a clip.
Will a new cartridge fix low water pressure?
It can, if a scaled-up or partially blocked cartridge is choking flow — that’s a common hidden cause. But first check the aerator at the spout tip, since a clogged aerator screen is the number-one cause of sudden low pressure and takes 60 seconds to rinse. If a clean aerator doesn’t help and flow is still weak, a fresh cartridge often restores full pressure.
About the author: This guide was written by the WOWOW Faucet product and installation team, drawing on hands-on testing of single- and two-handle kitchen faucet cartridges across ceramic-disc and stem designs. About WOWOW: WOWOW designs and sells kitchen and bathroom faucets, shower systems, and fixtures direct to homeowners, with cartridges built to standard sizing and validated for durability. Our ceramic-disc cartridges are cycle-tested to meet industry longevity standards, and WOWOW faucets are backed by a limited lifetime warranty — if a cartridge fails, contact support with your model number for a free replacement part before you buy one.