 WOWOW Faucets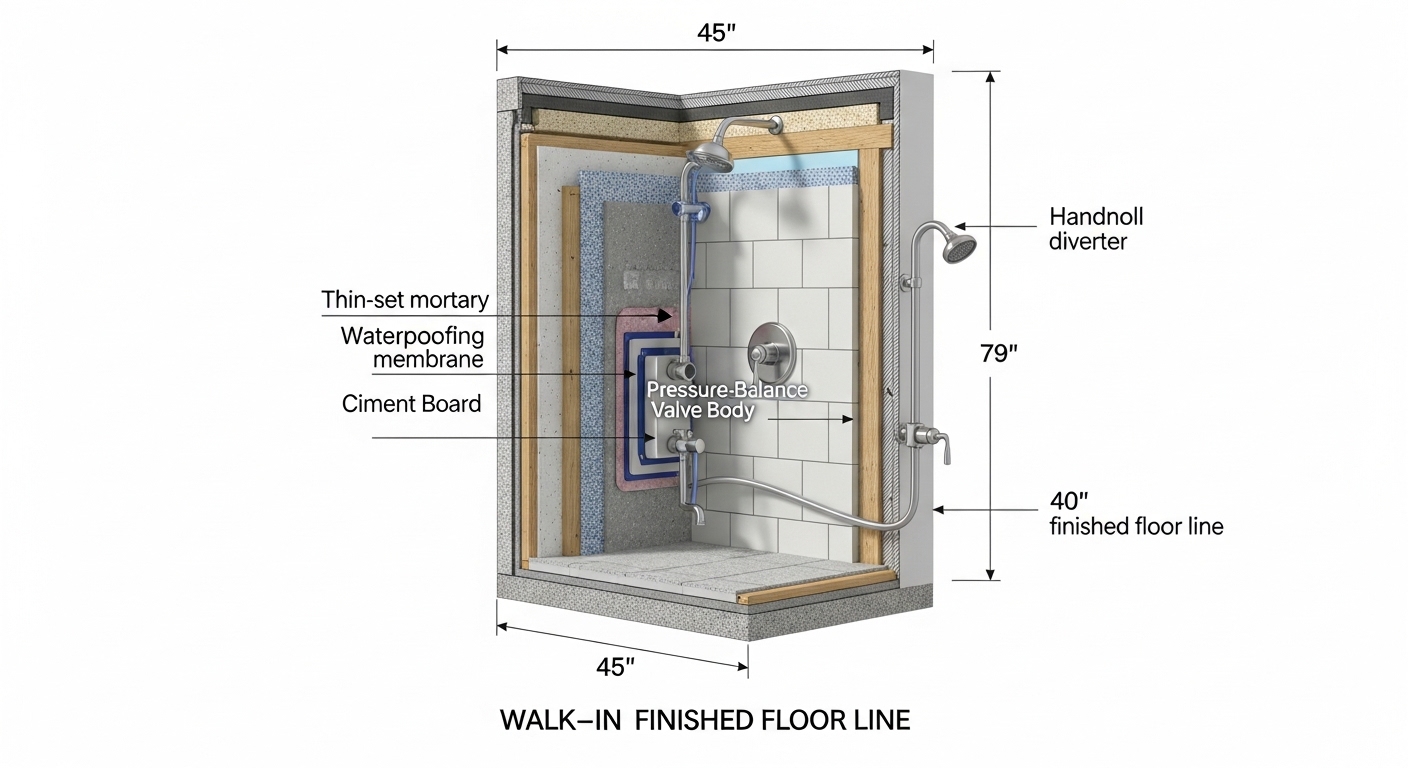
Getting the walk in shower valve rough in height right is one of those decisions you make once, behind the wall, and then live with for 20 years — so it’s worth 10 minutes of thought before the drywall goes up. The “rough-in” is where you fix the valve body onto the backing before tile and cement board hide it forever. Set it too low and tall users hunch to adjust the temperature; set it too high and it disappears behind a tiled niche or fights your shower head placement. Below is exactly where to put it, why those numbers exist, and how to adjust for your own height, layout, and fixture type.
What height should a walk-in shower valve be roughed in at?
Center the valve body at 45 inches above the finished floor as a safe default, with anything from 42 to 48 inches being perfectly normal. “Finished floor” is the key phrase — that means after the tile, mortar bed, or shower pan is in, not the bare subfloor or the slab. If your finished floor will sit an inch or two above the rough surface you’re standing on, add that to your measurement so the valve doesn’t end up lower than you planned.
Here’s the reasoning behind 45 inches. It lands at a comfortable elbow-to-chest height for most adults, so you can reach in, turn the handle, and test the water without stepping fully under the spray. It also leaves clean vertical space above for the shower arm at 78–80 inches and below for a bench, a niche, or a handheld slide bar. In a curbless or barrier-free walk-in shower, that mid-wall zone stays clear of the seat and the threshold, which keeps the plumbing simple.
Does the valve height change for a curbless or barrier-free shower?
Not really — the valve height stays about the same, but you gain flexibility because there’s no bench or curb dictating your reach. In an accessible walk-in shower designed for a seated user or aging-in-place, drop the valve to around 38 to 40 inches so it’s reachable from a shower chair, and pair it with a handheld on a slide bar. If the shower serves both standing and seated users, mounting the valve at 42 inches is a good compromise, and adding a separate handheld diverter lower on the wall covers the seated case without lowering the main valve for everyone.
How high should the shower head and valve be relative to each other?
Keep the shower arm at 78–80 inches and the valve down at 42–48 inches, which means there’s roughly 30 to 38 inches of pipe between them. The valve does the mixing; the shower arm just delivers water up top. They connect through a vertical riser inside the wall, so the exact gap isn’t critical — but the two numbers should be planned together so your tile layout, niche, and grab bar don’t collide with either one.
A common mistake is roughing in the valve and the shower arm on different days without a story pole or a marked stud, then discovering the valve sits dead-center behind where the tile niche was supposed to go. Mark both heights on the studs at the same time, in pencil, and stand in the space to sanity-check them before you commit. If more than one household member showers, set the shower arm for the tallest person — you want the water coming from above the top of their head, and shorter users can angle an adjustable head down.
What if I have a rain head plus a handheld on the same wall?
Run the main pressure-balance valve at 45 inches, feed the rain head up at the ceiling or 82–84 inches, and put the handheld’s diverter and drop elbow around 40–42 inches. In a multi-outlet walk-in shower you’re really roughing in three things: the mixing valve, the diverter that chooses between outlets, and each outlet’s supply. The diverter is the one your hand touches most while standing, so keep it in that comfortable 40–48 inch band even if the outlets themselves sit high and low. If you’re weighing whether a wall or tub-spout handheld is even the right call, our guide to a handheld shower head that connects to a tub faucet walks through the trade-offs.
What’s the difference between the valve, the diverter, and the mixing valve heights?
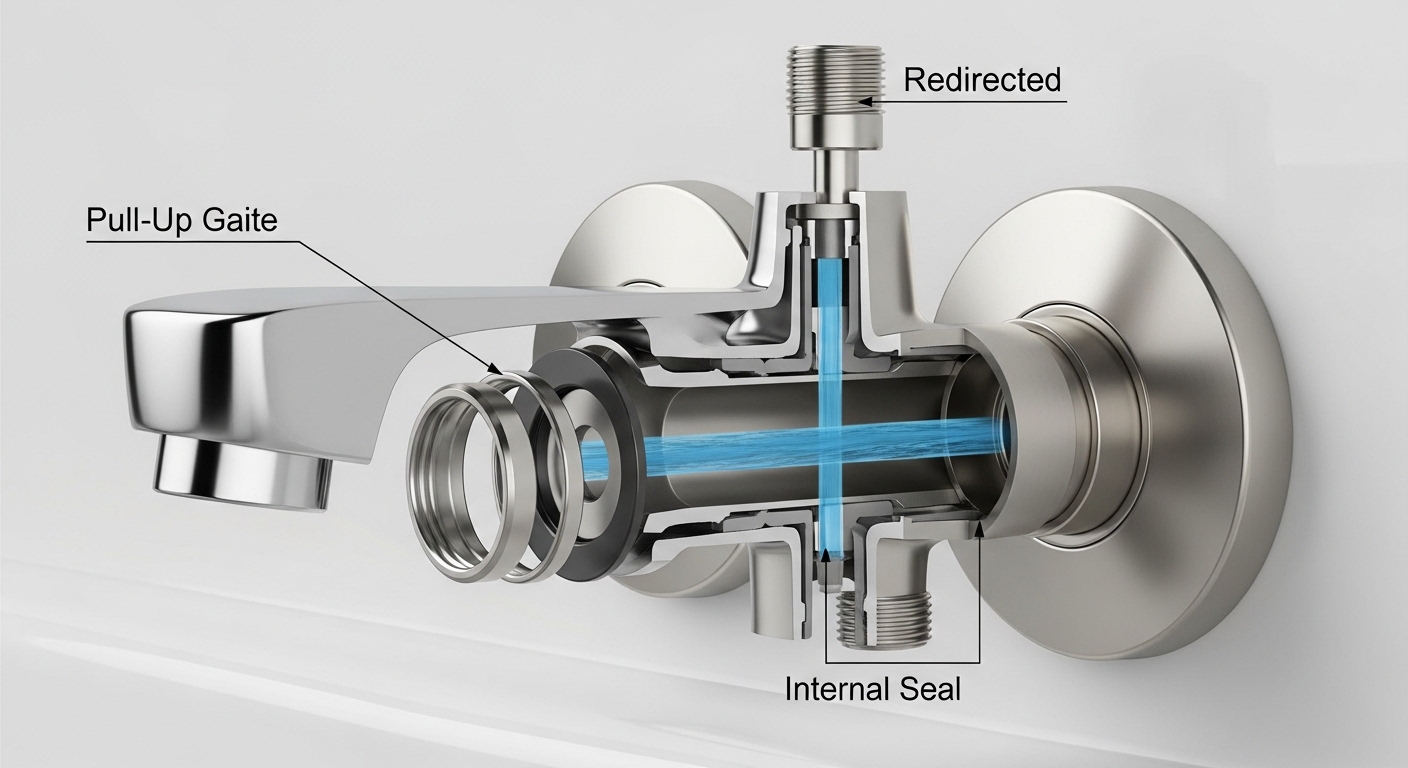
They’re three different jobs and they don’t all live at the same height. The mixing/pressure-balance valve controls temperature and lives at 42–48 inches. A diverter routes water between the shower head, a handheld, or a tub spout, and usually sits with or just below the valve. A dedicated volume or transfer valve for a multi-head system can go a little lower for easy reach. Here’s how the common pieces compare.
| Component | What it does | Typical rough-in height (above finished floor) | Reach priority |
|---|---|---|---|
| Pressure-balance / thermostatic valve | Sets water temperature, protects against scald spikes | 42–48 in (45 in typical) | High — adjusted every shower |
| Shower arm / head | Delivers overhead spray | 78–80 in (rain head 82–84 in) | Low — set once |
| Handheld drop elbow / slide bar top | Feeds handheld hose | 40–48 in (bar extends to ~72 in) | Medium |
| Diverter / transfer valve | Switches between outlets | 38–45 in | High — used mid-shower |
| Tub spout (if combo) | Fills the tub | 4–6 in above tub deck | Low |
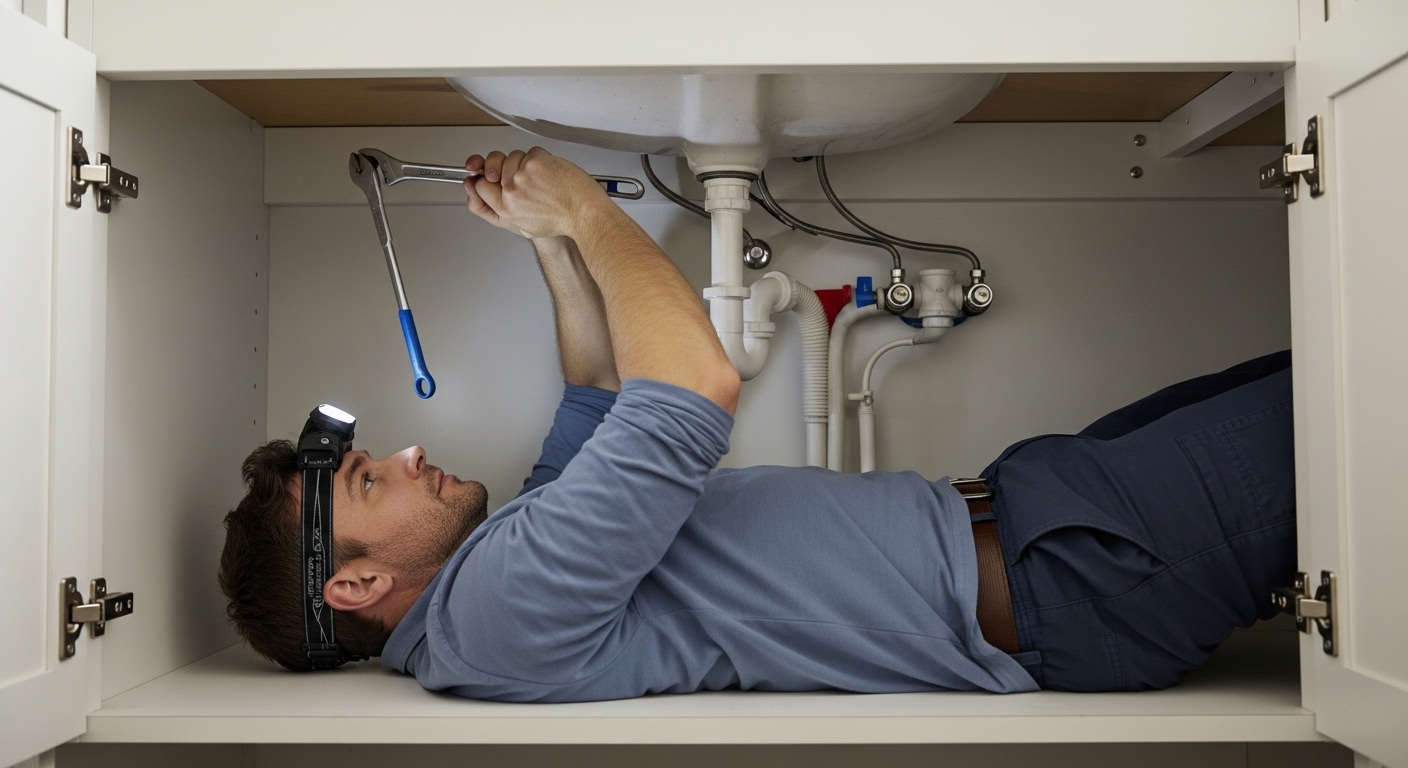
If your diverter is acting up after install — the classic “water comes out of both outlets at once” problem — that’s usually a valve or cartridge issue, not a height issue. Our walkthrough on why a new diverter valve is not working covers the quick fixes before you blame the rough-in.
How do I adjust the valve height for my own height and family?
Take the tallest regular user’s height, and aim to place the valve so the handle sits roughly at their lower-chest to belly-button level — for most people that lands the valve in the 42–48 inch range. There’s no single legal height for a residential shower valve, so you get to tune it. A household of tall adults might push the valve to 48 inches; a home planning for accessibility might drop it to 38. The numbers below give you a starting point.
- Standard adult household: valve at 45 in, shower arm at 80 in.
- Tall users (6’2″+): valve at 48 in, shower arm at 82 in, rain head at 84 in.
- Shorter users / kids’ bathroom: valve at 40–42 in, adjustable arm at 76–78 in.
- Accessible / seated use: valve at 38–40 in, handheld on a slide bar, controls reachable from a bench.
- Curbless walk-in, mixed use: valve at 42 in, plus a lower handheld diverter at 40 in.
One thing people forget: measure to the center of the valve body, because trim plates (escutcheons) extend several inches above and below it. A valve centered at 45 inches with a tall trim kit can have its top edge near 50 inches — check that against your tile niche and any grab bar so nothing overlaps.
Does building code set a required shower valve height?
No U.S. plumbing code fixes an exact valve height, but code does require that the valve itself be an anti-scald type — a pressure-balancing, thermostatic, or combination valve that limits outlet temperature to 120°F. That requirement comes from the IPC and UPC and is about the valve type, not where you mount it. Accessibility standards (ADA) do specify reach ranges for public and barrier-free showers, generally keeping controls between 38 and 48 inches, which is exactly why the numbers above cluster there. For a private home, treat those as strong guidelines rather than hard law, and always confirm with your local inspector before you close the wall.
How do you rough in a walk-in shower valve step by step?
Mark your finished-floor line first, measure up to 45 inches, and secure the valve body to a cross-brace between the studs at that mark — the rest is plumbing the supply and outlet correctly. Rushing this is how valves end up crooked, too deep behind the tile, or plumbed backward (hot on the right). Here’s the sequence pros follow.
- Establish the finished floor height. Account for the shower pan, mortar, and tile thickness. All your measurements reference this line, not the subfloor.
- Mark the valve center at 42–48 inches. Pencil it on the stud. Mark the shower arm at 78–80 inches at the same time.
- Set valve depth to the plaster guard. Every valve has a “min/max” wall-thickness range molded into the body or its mud guard. The finished tile face must land inside that range or the trim won’t seat. This is the step most DIYers miss.
- Install a solid cross-brace. Screw a 2×6 or metal bracket between studs and fasten the valve to it so it can’t shift when you connect pipe.
- Plumb hot-left, cold-right, outlet up. Confirm the inlet and outlet ports match the arrows on the valve casting.
- Run the riser and drop ear for the shower arm. Secure the drop-ear elbow to blocking at 78–80 inches so the arm doesn’t wobble.
- Pressure-test before you close the wall. Cap the outlets, charge the lines, and watch for drips for at least 15 minutes.
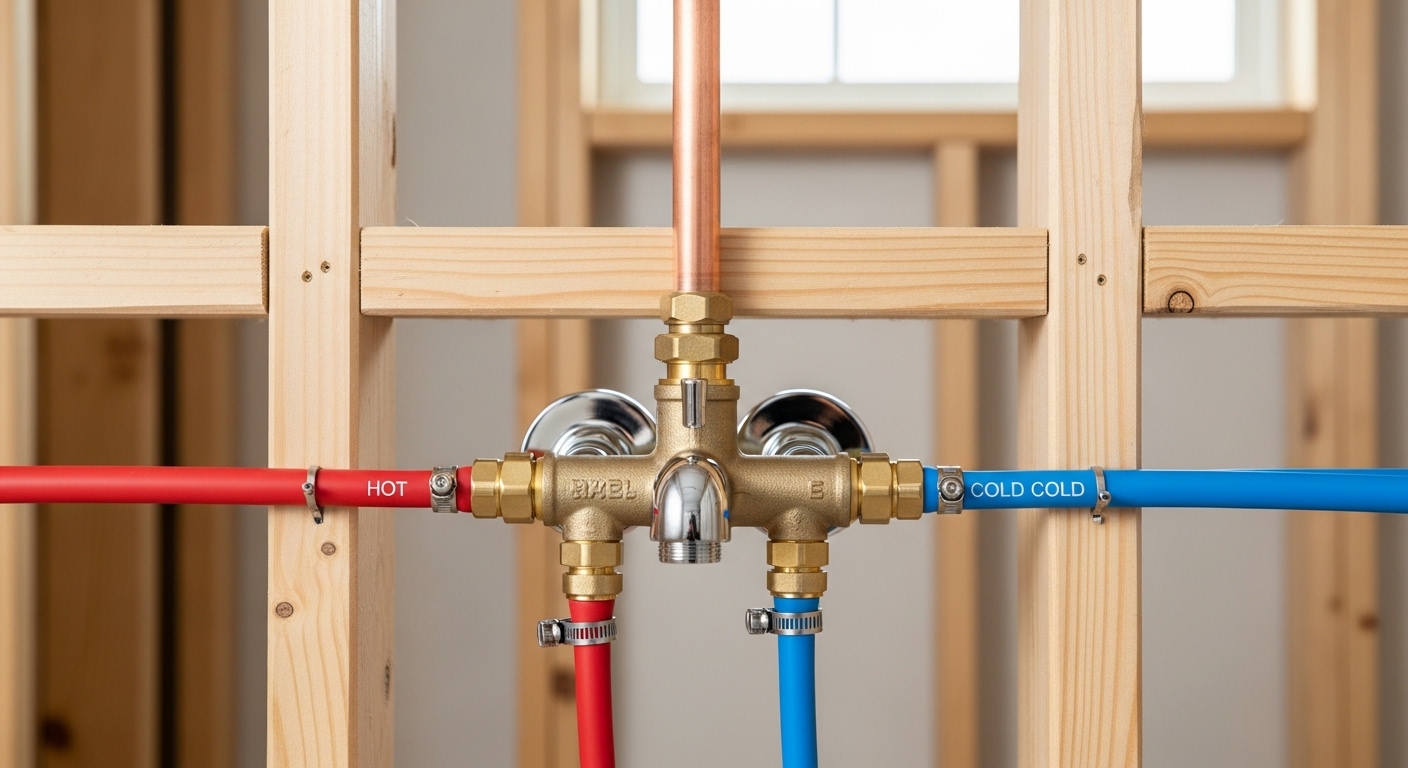
If you’re plumbing the shower in flexible PEX rather than copper, the bracing and depth rules matter even more because PEX can flex behind the valve. Our detailed guide to a shower valve installation with PEX covers the connections and support spacing that keep everything rock-solid.
What happens if the shower valve is set too high or too low?
Too high, and short users can’t comfortably reach the handle and it may crowd your shower arm or niche; too low, and you’re bending to adjust temperature and the trim can clash with a bench or curb. Neither is dangerous — the valve still works — but both are daily annoyances you can’t fix without opening the wall. A valve set too deep behind the tile (a depth problem, not a height one) is worse: the trim won’t seat against the wall and you’ll see a gap or the handle won’t fully engage the cartridge stem.
There’s also a performance angle. If the valve sits so low that the riser to a high rain head is long and narrow, you can lose a bit of pressure by the time water reaches the head — though that’s usually a pipe-diameter or flow-restrictor issue, not a height one. If your existing shower already dribbles, our fix-it guide on low pressure out of a shower head helps you diagnose whether it’s the head, the valve, or the supply.
FAQ
How high should a shower valve be off the floor?
About 42 to 48 inches above the finished floor, with 45 inches being the most common center height. Adjust up for tall households or down toward 38–40 inches for accessible, seated-use showers. Measure to the center of the valve body, not the top of the trim plate.
Is there a code-required height for a walk in shower valve rough in?
No — U.S. plumbing codes don’t mandate an exact valve height for a private residence. What code does require is an anti-scald pressure-balance or thermostatic valve that caps outlet temperature at 120°F. ADA accessibility standards suggest 38–48 inches for reachable controls, which is why most installs land in that range. Always confirm with your local inspector.
Should the shower valve and shower head be on the same wall?
Usually yes — they share a single riser inside one wet wall, which keeps the plumbing simple and lets you mark both heights on the same studs. In larger walk-in showers with a rain head fed from the ceiling, the valve stays on the wall while the outlet moves overhead, but the mixing valve itself almost always mounts on the main plumbing wall.
How far should the valve stick out from the wall?
It’s not about how far it sticks out — it’s about landing inside the valve’s marked depth range. Every valve body has a molded min/max line (or a plaster guard) showing how thick the finished wall can be. Your tile face must fall between those marks so the trim seats flush and the handle fully engages the cartridge. Set depth before you set anything else in stone.
Can I change the valve height without demolishing the whole shower?
Only by opening the wall behind the valve. The valve body is fastened to bracing between the studs and hard-plumbed, so moving it means removing tile and cement board on that section, relocating the brace and pipe, and re-tiling. That’s exactly why nailing the rough-in height before drywall matters — it’s a cheap decision now and an expensive one later.
What height should I use for a handheld-only walk-in shower?
Mount the mixing valve at 42–45 inches and the slide-bar top around 72 inches, with the drop elbow or supply at 40–48 inches so the hose reaches comfortably whether you’re standing or seated. A handheld-only setup is the most flexible for mixed-height households and accessibility, since the spray comes to you instead of you positioning under a fixed head.
About the author: This guide was written by the WOWOW Faucet product and install team, which has spent years designing, bench-testing, and field-installing shower valves, diverters, and trim kits across single- and multi-outlet systems. Why trust WOWOW: WOWOW is a dedicated faucet and bathroom-fixtures brand whose pressure-balance and thermostatic shower valves are built to cUPC/NSF standards, tested for anti-scald performance to the 120°F limit, and backed by a limited lifetime warranty on the valve body and finish. We publish these install guides so your fixtures go in right the first time — but for anything hidden behind a wall, we always recommend a licensed plumber verify local code before you close it up.
Hello!Please sign in