Over time, faucets that once worked smoothly can start to drip, lose pressure, or feel stiff when turning the handles. One of the most common causes of these issues — especially in older or traditional-style faucets — is worn internal springs. These small but crucial components help regulate water flow by pushing rubber seats tightly against the valve openings, ensuring a proper seal when the handles are turned off. If the springs wear out or lose tension, the faucet can begin to leak even when shut off. Fortunately, replacing faucet internal springs is a straightforward task that requires only basic tools and a little patience.
In this guide, we’ll walk you through everything you need to know — from understanding what faucet springs do, to identifying the signs of failure, gathering the right tools, and performing a safe, step-by-step replacement.
1. Understanding Faucet Internal Springs
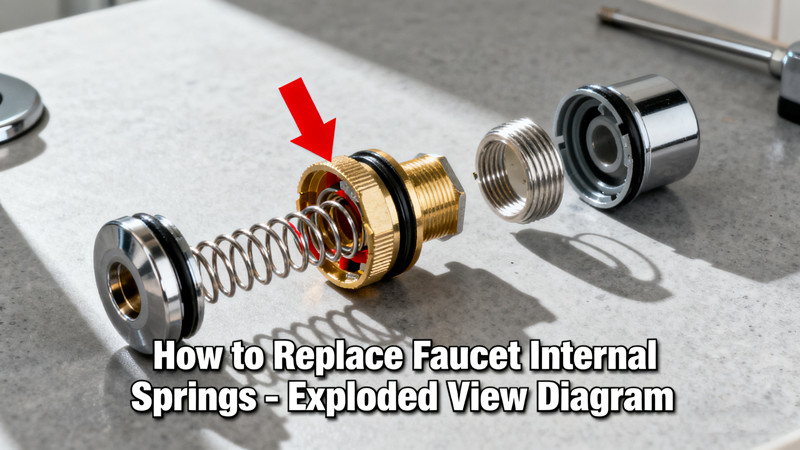
Before diving into the repair process, it’s helpful to understand what faucet springs are and how they function. In many two-handle faucets (especially those with compression or ball-type mechanisms), the springs sit beneath small rubber seats inside the valve body. Together, the spring and seat form a watertight seal that controls the flow of water when the handle is turned on or off.
When you turn the handle to shut off the faucet, the spring pushes the rubber seat firmly against the valve opening, stopping water from passing through. Over time, the spring can corrode, weaken, or lose tension, which prevents the seat from sealing completely. The result? A slow, persistent drip — one of the most common plumbing annoyances.
Replacing the springs and seats restores proper tension and eliminates leaks, ensuring your faucet works like new again.
2. Signs That Faucet Springs Need Replacement
While a dripping faucet is the most obvious symptom, several other signs can indicate that the internal springs are worn or damaged. Look out for the following:
- Constant Dripping: Water continues to drip from the spout even after the handles are tightly closed.
- Stiff or Uneven Handle Movement: If one handle feels tighter or looser than the other, the internal spring tension may be unbalanced.
- Weak Water Flow: A damaged spring or seat may restrict water flow, resulting in reduced pressure.
- Uneven Temperature Control: For dual-handle faucets, a failing spring can affect the balance between hot and cold water flow.
- Noise During Operation: A faint squeak, pop, or grinding sound when turning the handle may signal worn internal parts.
If your faucet shows one or more of these symptoms, replacing the springs and seats is a cost-effective way to restore full performance without replacing the entire fixture.
3. Tools and Materials You’ll Need
Replacing faucet internal springs doesn’t require advanced plumbing skills or expensive equipment. Here’s what you’ll need:
- Allen wrench or screwdriver (to remove handle screws)
- Adjustable wrench or basin wrench
- Needle-nose pliers
- Replacement spring and seat kit (specific to your faucet brand/model)
- Plumber’s grease or silicone lubricant
- Rag or towel
- Small bowl or tray to hold small parts
Most faucet manufacturers offer repair kits that include both rubber seats and metal springs. Always verify that the kit matches your faucet’s model — the components are not universally interchangeable.
4. Step-by-Step Guide to Replacing Faucet Springs
Step 1: Turn Off the Water Supply
Start by shutting off the water supply valves under the sink. Turn the handles clockwise until tight. Then, open the faucet handles to release any remaining pressure and drain residual water from the lines. This step prevents accidental splashing or flooding when you disassemble the faucet.
Step 2: Remove the Faucet Handles
Depending on the design, faucet handles may be secured with a small screw at the top, side, or under a decorative cap. Use an Allen wrench or screwdriver to loosen and remove the screw. Gently lift the handle off the stem. If it feels stuck, wiggle it back and forth carefully — avoid using excessive force that could damage the finish.
Step 3: Remove the Faucet Cartridge or Ball Assembly
Once the handle is off, you’ll see the retaining nut or dome cap that holds the internal components in place. Use an adjustable wrench to unscrew it. Beneath the cap, you may find a cartridge (in ceramic or compression models) or a ball assembly (in ball-type faucets). Lift the assembly out carefully, noting how the parts are arranged — it’s a good idea to take a quick photo for reference during reassembly.
Step 4: Locate the Springs and Seats
Inside the faucet body, you’ll find small rubber seats with springs sitting underneath them, typically near the base of the openings for hot and cold water. Use needle-nose pliers to gently pull out each rubber seat along with its spring. Inspect them closely — if the spring is rusted, flattened, or misshapen, it’s definitely time for replacement.
Step 5: Install the New Springs and Seats
Take your replacement parts and lightly coat the rubber seats with plumber’s grease to make installation easier and ensure a tight seal. Insert the new spring into the seat, making sure the narrow end of the spring faces upward. Then press the assembly firmly into the valve opening. Repeat the process for both hot and cold sides.
Step 6: Reassemble the Faucet
Once the new springs and seats are installed, replace the ball assembly or cartridge exactly as it was. Screw the retaining nut or cap back into place securely, but don’t overtighten. Reattach the handles and secure them with their screws.
Step 7: Turn the Water Back On
Slowly open the water supply valves under the sink. Turn on the faucet and let the water run for a few seconds to flush out any trapped air or debris. Check carefully for leaks around the base, handles, and spout. If no water is dripping and the handle movement feels smooth, your replacement was successful.
5. Pro Tips for a Successful Replacement
- Work in a well-lit area: Faucet springs are small and easy to drop. Use a bright flashlight or task lamp for visibility.
- Take pictures as you go: This helps ensure you reassemble everything correctly if parts are unfamiliar.
- Replace both springs and seats: Even if only one side is leaking, replace both sets to maintain consistent pressure and prevent future issues.
- Use plumber’s grease sparingly: A thin layer on rubber parts reduces wear and prevents sticking without affecting water quality.
- Check water pressure afterward: If flow is weak, double-check that springs and seats are aligned properly and that no debris is trapped in the valve.
6. When to Consider Professional Help
In most cases, replacing faucet springs is a simple DIY project that takes under an hour. However, if you encounter corrosion, stripped threads, or a damaged valve body, professional help might be necessary. A licensed plumber can inspect the faucet for deeper issues and advise whether a full cartridge or faucet replacement would be more cost-effective.
7. Conclusion
Faucet internal springs may be small, but they play a big role in ensuring smooth operation and leak-free performance. Knowing how to replace them not only saves you the expense of calling a plumber but also extends the life of your faucet. With just a few tools and a careful approach, you can restore your faucet’s efficiency, stop annoying drips, and improve overall water control. Regular maintenance — including checking springs, seats, and seals — keeps your plumbing system running smoothly for years to come. A properly functioning faucet isn’t just about convenience; it’s about maintaining the reliability and hygiene of your entire water system.
 WOWOW Faucets


