 WOWOW Faucets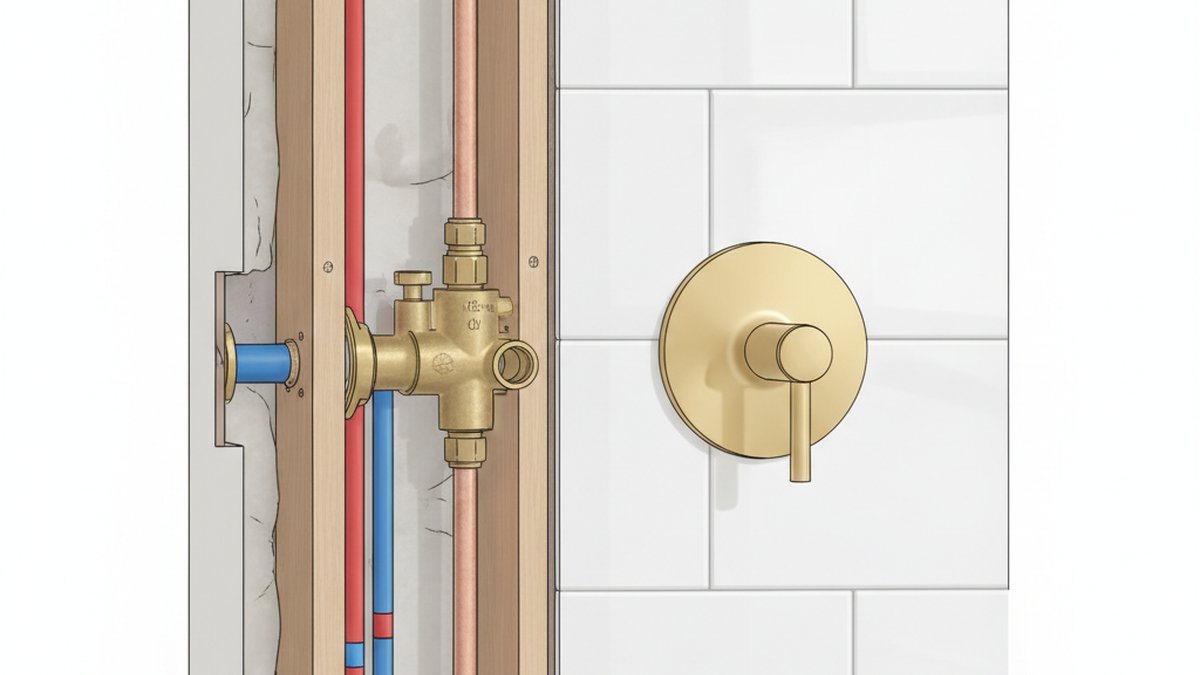
If you’re planning a shower project, understanding the shower valve rough in and trim is the single most important thing to get right — more than the tile, more than the shower head, more than the finish. Nearly every “why does my shower drip / why won’t my new handle fit” call a plumber gets traces back to a rough-in and trim that were mismatched, installed at the wrong depth, or bought as separate incompatible brands. Get these two pieces right and the rest of the install is genuinely straightforward. This guide walks through exactly what each part does, how they work together, and the mistakes that cost people a torn-out wall.
At WOWOW Faucet, we’ve shipped shower and tub fixtures to hundreds of thousands of North American bathrooms, and our support team fields these exact questions daily. Below is the plain-English version of what our product engineers and the pros we work with actually tell people.
What exactly is a shower valve rough-in?
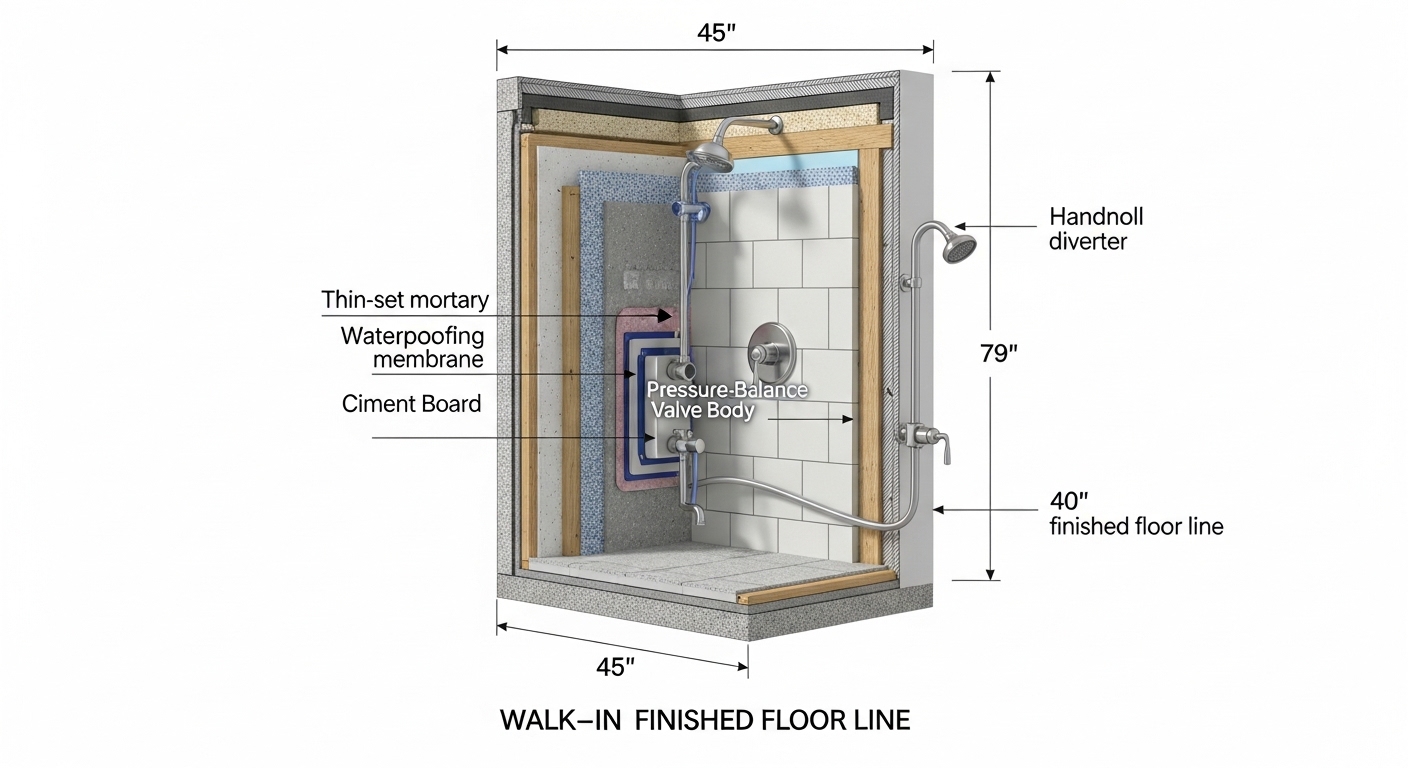
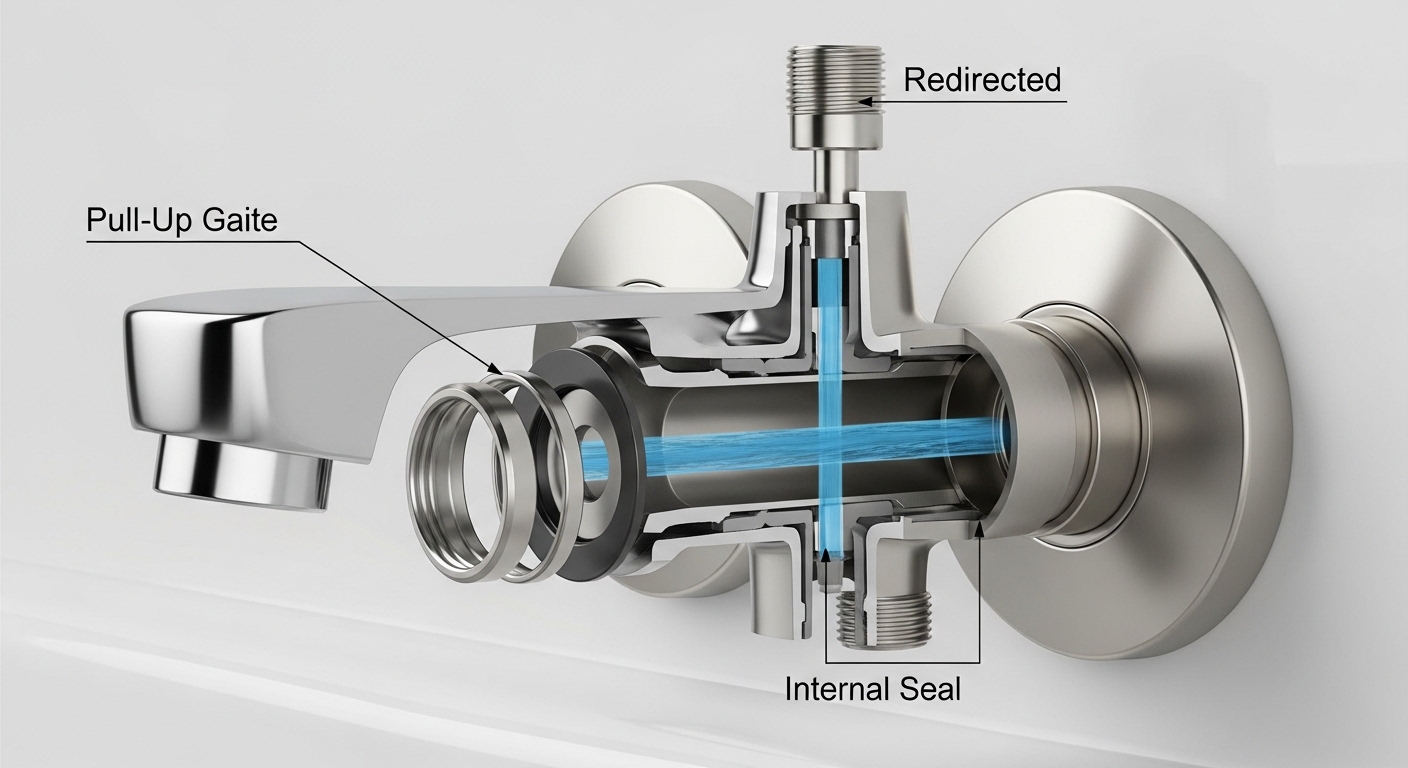
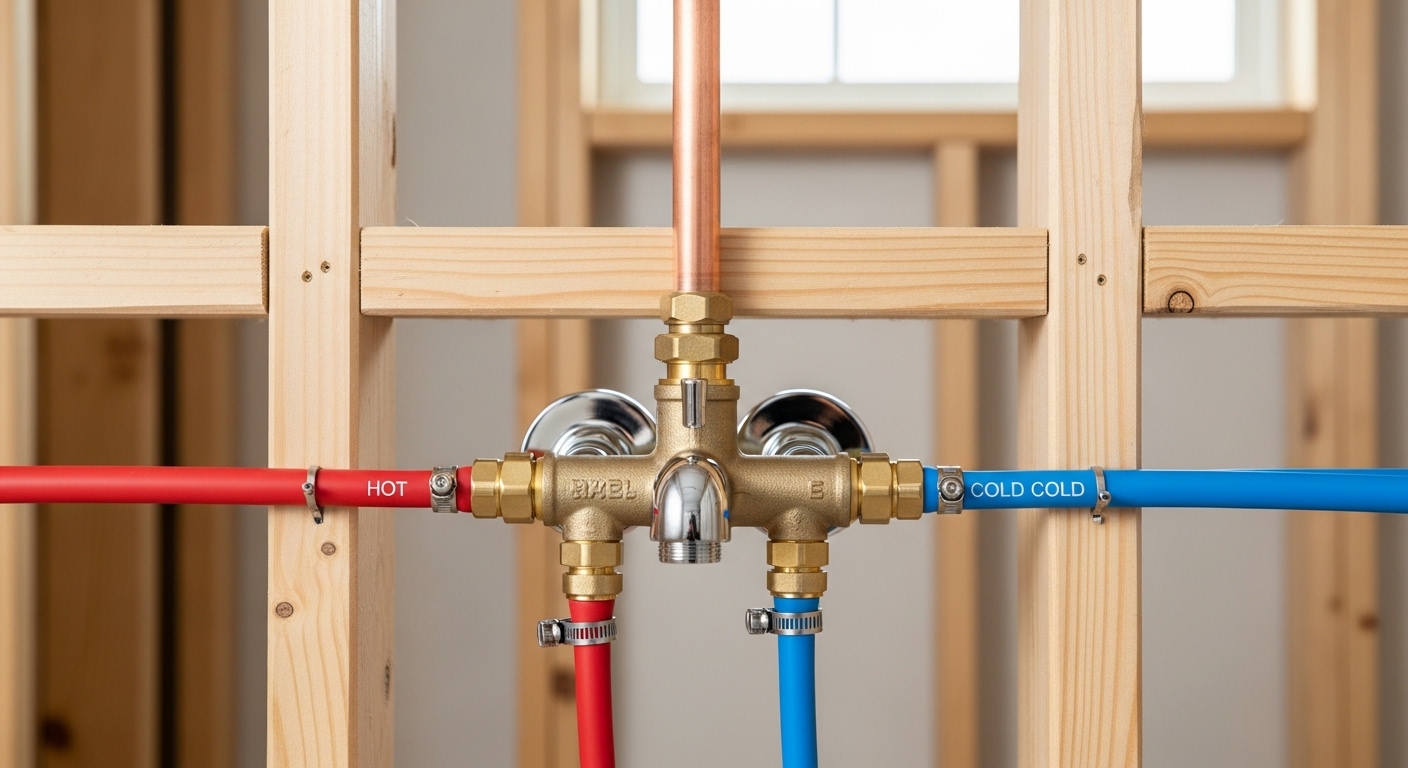
The rough-in is the brass valve body buried inside your wall — the part you never see once the tile goes up. It’s the hub where your hot and cold supply lines meet, mix to your chosen temperature, and route water either up to the shower head or down to the tub spout. It gets installed during the “rough-in” phase of construction, before drywall and tile, which is exactly where the name comes from.
A modern rough-in typically includes a few key elements:
- The valve body: heavy brass, with four ports — hot inlet, cold inlet, shower riser outlet (top), and tub spout outlet (bottom). A shower-only valve uses just the top outlet and caps the bottom.
- The cartridge: the moving heart of the valve that mixes hot and cold. Pressure-balancing and thermostatic cartridges live here.
- A plaster guard (mud guard): a plastic cover that protects the valve during tiling and, critically, marks the correct finished-wall depth.
- Integrated stops (on better valves): small screwdriver-turn shutoffs so you can service the shower later without killing water to the whole house.
The most important spec on any rough-in is its finished-wall depth range — the distance the valve can sit behind the final tile surface and still let the trim reach it. Most valves accommodate roughly 1-3/4″ to 2-3/4″ of finished wall. Install the valve too deep and your handle won’t seat; too shallow and the escutcheon won’t sit flush. The plaster guard has depth lines printed right on it for this reason — respect them.
What is the shower trim, and why is it sold separately?
The trim is everything you see and touch: the handle, the decorative escutcheon (the round or square plate against the tile), the temperature limit stop, and — on tub/shower setups — sometimes the diverter and spout. It bolts onto the rough-in valve after the wall is completely finished.
Trim is sold separately from the rough-in for two very practical reasons. First, timing: the plumber sets the rough-in weeks before the tile is done, and the delicate finished-metal trim would only get scratched or splashed with thinset if it were installed early. Second, flexibility: one rough-in body can accept many different trim styles and finishes. That means you can pick a brushed gold, matte black, or chrome handle to match your bathroom without changing the plumbing behind the wall — and you can update the look years later by swapping only the trim.
Do the rough-in and trim have to be the same brand?
Yes — in almost every case the rough-in and trim must be the same brand and the same valve series. This is the number-one mistake DIYers make. A WOWOW trim will not fit a Moen or Delta rough-in, and even within one brand a “Series A” trim often won’t mate to a “Series B” valve. The splines on the cartridge stem, the mounting-screw pattern, and the escutcheon threading are all series-specific.
The one bit of good news: many brands sell the valve and trim together as a matched kit, which removes all guesswork. If you buy them separately, confirm the exact valve model the trim is rated for — it’s printed on both boxes. If you’re replacing only the trim on an existing shower, identify the valve behind the wall first; sometimes you can find a “universal-fit” trim, but treat that as the exception, not the rule.
| Feature | Rough-In Valve | Trim Kit |
|---|---|---|
| Location | Inside the wall, hidden | On the finished wall surface |
| Main parts | Brass body, cartridge, plaster guard, stops | Handle, escutcheon, limit stop, diverter |
| When installed | Before tile/drywall | After the wall is finished |
| Connects to | Hot, cold, shower & tub pipes | The rough-in valve stem |
| Determines | Water mixing & safety function | Look, finish, and feel |
| Swappable later? | No — requires opening the wall | Yes — swap for a new look anytime |
Which valve type do I need — pressure-balancing or thermostatic?
For a standard single-handle shower on a budget, a pressure-balancing valve is what you want; for a spa-style shower where you want to dial an exact temperature or run multiple sprays at once, spend up for a thermostatic valve. Both are anti-scald, but they protect you differently.
A pressure-balancing valve keeps the hot-to-cold ratio steady, so when someone flushes a toilet and cold pressure drops, the valve throttles the hot to match — you don’t get scalded. It doesn’t hold an exact temperature number; it holds the balance. These are affordable, reliable, and standard in most American homes.
A thermostatic valve senses actual water temperature and holds it to a set degree regardless of pressure or incoming temperature swings. It also has much higher flow capacity, which is why it’s the choice for showers with a rain head plus body sprays running together. Here’s a quick comparison:
| Valve type | Anti-scald method | Best for | Typical cost |
|---|---|---|---|
| Pressure-balancing | Holds hot/cold ratio | Single shower head, everyday use | $40–$90 |
| Thermostatic | Holds exact temperature | Multiple sprays, precise control | $120–$300 |
| Volume + thermostatic combo | Temperature + independent flow | Luxury multi-outlet systems | $250–$500+ |
One more term worth knowing: the number of “functions” or “ports.” A basic shower-only valve is often labeled “2-function” internally; a tub/shower valve with a diverter to switch between spout and head is “3-function.” Match the valve’s outlet count to how many things — spout, hand shower, rain head — you actually plan to run.
How do you install a shower valve rough-in step by step?
The rough-in goes in before the wall is closed, gets pressure-tested, then the trim goes on after tile. Here’s the realistic sequence a pro follows. If you’re comfortable sweating copper or using PEX and shutting off your water main, this is a doable weekend job; if soldering near stud framing makes you nervous, this is the stage to hire out.
- Shut off the water at the main and open a low faucet to drain the lines.
- Set the valve height. A tub/shower valve typically sits 28″–34″ off the tub floor; a shower-only valve goes 40″–52″ up. Mount it to a horizontal cross-brace between studs.
- Check the depth. Position the valve so the printed line on the plaster guard will land flush with your finished tile surface — account for backer board plus tile plus thinset.
- Connect the pipes: hot to the marked hot inlet, cold to cold, the top outlet up to the shower riser, the bottom outlet down to the tub spout (or capped for shower-only).
- Solder or crimp the connections. If soldering, remove the cartridge first so the heat doesn’t destroy its seals — this step is skipped constantly and ruins valves.
- Pressure-test. Turn the water back on with the cartridge out and a test cap in place, or with it assembled, and watch every joint for drips before you close the wall.
- Install backer board and tile, leaving the plaster guard in place to protect the valve.
- Install the trim: remove the guard, slide on the escutcheon, attach the handle, and set the anti-scald limit stop to your climate.
That last step — the temperature limit stop — matters. It’s a small adjustable ring inside the trim that caps how far toward “hot” the handle can turn. In colder regions your incoming cold is colder, so you can allow a bit more hot; set it so the hottest position tops out around a safe 105°F–110°F at the head. If you ever find your shower cooler than expected after a trim install, this is usually the culprit, not the water heater.
Because so many shower problems are actually cartridge problems, it’s worth knowing that the cartridge inside the rough-in is a serviceable wear part. If your temperature control gets erratic or the handle stiffens years down the road, you often don’t need a new valve at all — just a new cartridge. Our step-by-step guide to replacing a faucet cartridge covers the same principle that applies to shower valves. And if you’re doing a full fixture refresh, our complete bathtub faucets buying guide walks through spout and diverter options that pair with these valves.
Can I replace just the shower trim without opening the wall?
Yes — if the existing rough-in valve is in good shape and you can match new trim to it, you can refresh the look without touching a single tile. This is the easiest, cheapest shower upgrade there is: swap a dated chrome handle for matte black or brushed gold in under an hour.
The catch is compatibility. Before you buy, turn off the shower’s water, pull the old handle and escutcheon, and identify the valve brand and series stamped on the cartridge or body. Then buy trim rated for that exact valve. If the underlying cartridge is also worn, replace it while you’re in there — it’s five extra minutes with the trim already off. If you can’t identify the valve or it’s a discontinued oddball, a same-brand valve-and-trim replacement is the reliable path, and that does mean opening the wall.
Shopping for a coordinated look across the whole bathroom? Our roundup of the best bath faucets of 2026 helps you match finishes between your shower trim, tub filler, and sink faucet so nothing clashes. And if your project also involves a new shower head, our safety-first guide to installing a shower head pairs naturally with a fresh trim install.
What are the most common rough-in and trim mistakes?
The costliest mistakes almost always happen at the rough-in stage, because fixing them means demolishing finished tile. The top four we see:
- Wrong depth. Valve set too deep or too shallow so the trim won’t reach or won’t sit flush. Always dry-fit against the finished wall thickness.
- Hot and cold reversed. Left should be hot. Reversing the inlets means the handle works backward and the limit stop protects the wrong direction.
- Soldering with the cartridge in. Heat melts the internal seals; the valve leaks from day one.
- Mismatched trim. Buying trim that doesn’t match the valve series — the single most common return we process.
Do a real pressure test before you close the wall, and keep the plaster guard on until the very last moment. Those two habits prevent the overwhelming majority of callbacks.
FAQ
Is a shower valve rough-in and trim the same thing?
No. The rough-in is the brass valve body inside the wall that mixes hot and cold water; the trim is the visible handle and escutcheon plate you install on the finished wall. They’re two separate components that work as a matched pair — you need both, from the same brand and series.
Can I use any brand of trim on my rough-in valve?
Almost never. Trim is engineered to fit a specific valve series from the same manufacturer — the cartridge stem splines and mounting pattern differ between brands and even between series within one brand. Always match trim to your exact valve model, or buy them together as a kit.
What is the standard shower valve rough-in height?
A combined tub/shower valve is usually set 28″–34″ above the tub floor, while a shower-only valve typically sits 40″–52″ off the shower floor. The shower head arm generally roughs in around 78″–80″ high. Adjust to the height of the tallest person who’ll use it.
Do I need to open the wall to change my shower handle?
Not if you’re only changing the trim and the valve behind it is sound. You can swap the handle, escutcheon, and even the cartridge from the front. You only need to open the wall if the valve body itself is failing or you’re switching to an incompatible brand.
How long does a shower rough-in valve last?
A quality brass rough-in valve body can last 20–30 years or more — it’s the internal cartridge that wears out first, typically after 5–15 years depending on water quality. Hard water shortens cartridge life. Because the cartridge is replaceable, the valve itself rarely needs to be cut out of the wall.
Does a shower valve come with the trim included?
Sometimes. Many brands sell matched valve-and-trim kits, which is the safest option for DIYers. But valves and trim are also sold separately so builders can rough in early and homeowners can choose finishes later — always check the listing to see which you’re buying.
The bottom line
Think of it this way: the rough-in is the engine and the trim is the styling. The rough-in decides whether your shower is safe, correctly mixed, and leak-free; the trim decides what it looks like and lets you restyle later without plumbing. Buy them as a matched set, respect the finished-wall depth, keep hot on the left, and pull the cartridge before you solder — do that, and a shower valve install is one of the most satisfying, reliable upgrades in the bathroom.
About the author: This guide was written by the WOWOW Faucet product content team and reviewed by our in-house fixture engineers, who specify and test shower valves for the North American market. WOWOW Faucet designs and sells kitchen and bathroom fixtures directly to homeowners across the U.S., and our shower valves are engineered to meet ASME A112.18.1 / CSA B125.1 anti-scald standards and are backed by a limited lifetime warranty on the valve body. Every cartridge design is cycle-tested for durability before it ships. As always, follow your local plumbing code and the instructions in the box, and when in doubt, consult a licensed plumber.