 WOWOW Faucets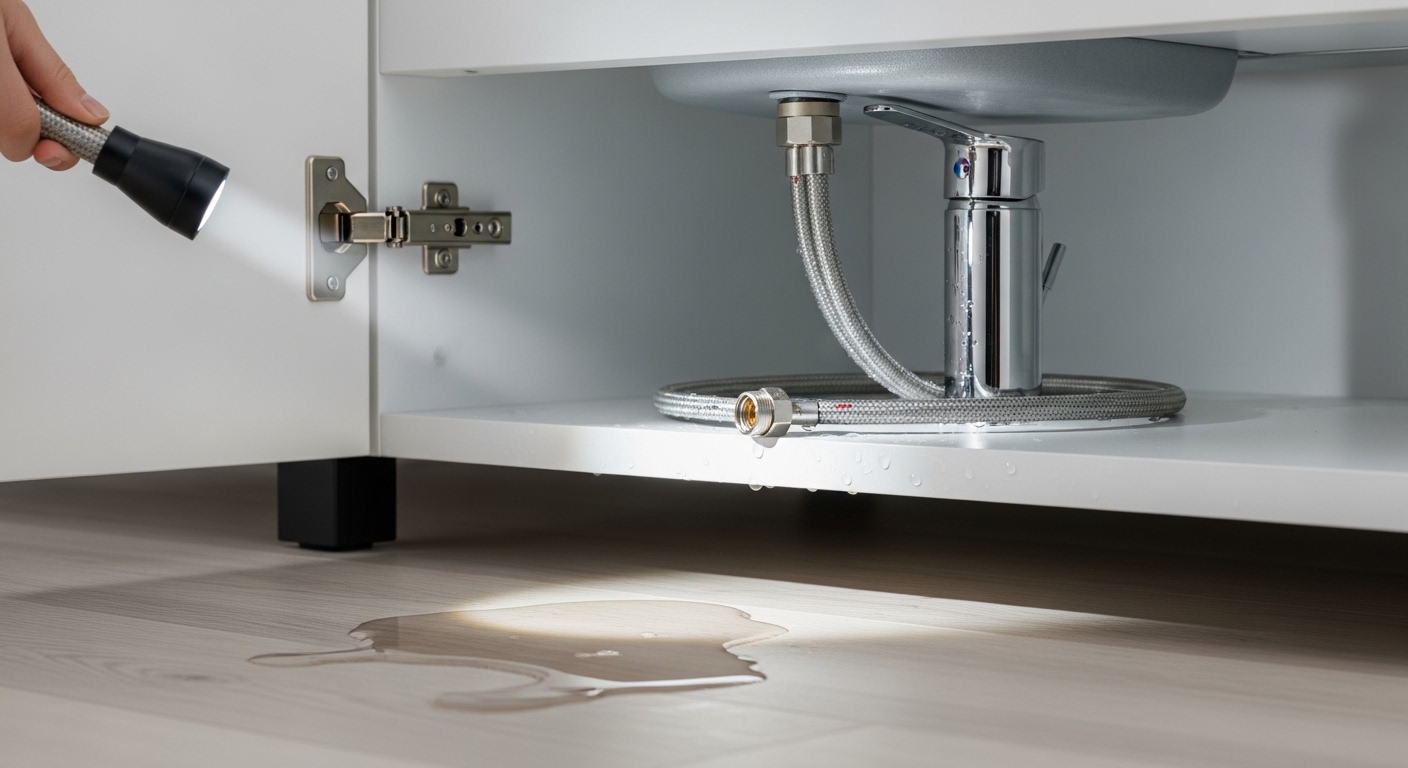
If you’ve got a single handle faucet leaking under sink and a puddle quietly forming in your vanity cabinet, the first thing to know is this: the leak you see under the sink and the drip you might hear above the sink are usually two totally different problems. A spout drip is a worn cartridge or seal. A cabinet puddle is water escaping the plumbing connections behind or beneath the faucet — and if you fix the wrong one, you’ll be back with a towel in an hour. This guide walks you through finding the exact source in about five minutes, then fixing it, whether you’re a confident DIYer or someone who’s never held a basin wrench.
Where is the water actually coming from under my single handle faucet?
The water is coming from one of four places, and you can identify which in five minutes with a paper towel. Under a single handle faucet, leaks originate at (1) the supply line connections, (2) the shut-off valves, (3) the faucet’s mounting/base seal, or (4) the cartridge inside the faucet body. Dry everything completely, then run the faucet hot and cold and watch which spot re-wets first.
Here’s the logic that catches almost every case. Wrap a dry paper towel around each supply-line nut and around the base of the faucet under the sink. Turn the water on. Whichever towel dampens first is your culprit. If nothing under the sink is wet but water is pooling anyway, the leak is running down the faucet body from a bad cartridge or base seal above — gravity carries it into the cabinet where you finally see it.
- Wet at the braided line nuts: loose connection or worn washer/gasket.
- Wet at the small oval valves on the wall: the angle stop (shut-off valve) itself is failing.
- Water tracking down the center threaded rod / mounting nut: cartridge or O-ring inside the faucet is leaking, or the base seal above the sink is cracked.
- Only wet after you use the handle, dry when off: classic cartridge failure.
- Wet even when the handle is fully off: supply side (line or valve), because those are pressurized 24/7.
That last distinction is the single most useful test. Supply-line and valve leaks weep constantly because they’re always under pressure. Cartridge and internal-seal leaks only show up when you open the handle. Note which one you have before you touch a tool.
Why is my single handle faucet leaking under the sink but not from the spout?
Because the leak is on the pressurized supply side, not the spout side. When a single handle faucet leaks under the sink with a dry spout, the water is escaping before it ever reaches the cartridge and aerator — typically at a braided supply line that has loosened over time, a rubber washer that has hardened, or a shut-off valve packing nut that’s weeping. None of that water goes up and out the spout, so the top of your faucet looks perfectly fine while the cabinet floor gets soaked.
This is the most common under-sink scenario and, happily, the cheapest to fix. Braided stainless steel supply lines have a rubber cone washer molded into each end. After 8–10 years that rubber compresses and cracks, or thermal cycling (hot–cold–hot) slowly backs the nut off a quarter turn. Either way, hand-tightening won’t always cut it and a fresh line is a $6–$10 part.
If the connections are bone dry but the valves on the wall are damp, the angle stop is the problem. These quarter-turn valves have an internal seal and a packing nut around the stem; both can weep, especially on valves that haven’t been turned in years. Tightening the packing nut a small amount often stops it. If it keeps dripping, the valve gets replaced — that’s a job where I’d tell most people to call a plumber, because it may involve shutting off the home’s main and sweating or compression-fitting a new valve.
How do I fix a leaking supply line or connection myself?
You fix it by shutting off the valves, disconnecting the wet joint, and either re-seating it with thread tape or swapping in a new braided line. Total time is about 20 minutes and the only tools you need are an adjustable wrench and, ideally, a bucket and towel. Here’s the exact sequence:
- Turn both shut-off valves clockwise until they stop. Open the faucet handle to release pressure — water should trickle then stop.
- Put a small bucket or towel under the connection. There’s always leftover water in the line.
- Hold the valve steady with one wrench and loosen the supply-line nut with another. Never twist the valve itself, or you’ll wreck the wall connection.
- Inspect the rubber cone washer inside the nut. Cracked, flattened, or missing? Replace the whole braided line — it’s cheaper and more reliable than reusing old rubber.
- Reconnect hand-tight, then snug about a quarter to half turn more with the wrench. These are compression-style fittings; do not gorilla it — overtightening splits the washer and causes the very leak you’re fixing.
- Turn the water back on slowly and watch the joint with a dry paper towel for two full minutes.
One note on thread tape (PTFE / “plumber’s tape”): braided supply-line nuts seal on the rubber cone washer, not the threads, so they usually don’t need tape. Tape belongs on threaded metal-to-metal connections like the shut-off valve inlet or a faucet shank adapter. Using tape where a rubber washer seals can actually keep the washer from seating flat.
If your water pressure has also felt weak lately, that’s often unrelated to the leak but worth ruling out while you’re down there — our guide on why there’s low water pressure from your sink faucet and how to fix it covers the aerator and cartridge checks that go hand-in-hand with this inspection.
The leak is coming from the faucet body — is it the cartridge?
If water only appears when you open the handle and it’s tracking down the center of the faucet into the cabinet, yes — it’s the cartridge or its O-rings. In a single handle faucet, one cartridge controls both temperature and flow. When its internal seals wear out, water bypasses them and either drips from the spout or escapes down the faucet body and into the cabinet. Replacing the cartridge fixes both symptoms and is the single most common repair on single-handle faucets.
A cartridge is a cylindrical insert (ceramic disc, ball, or compression style) that sits inside the faucet under the handle. Over years, the ceramic discs scratch, the rubber O-rings harden, or mineral scale builds up and holds them open a hair. The result is a leak that no amount of tightening will cure — the worn part has to come out. The good news: a genuine replacement cartridge runs $10–$25, and the swap takes 20–30 minutes with basic tools.
The mechanics are the same whether it’s a bathroom or kitchen faucet — if you want a fuller walk-through with the same handle-and-cartridge steps, our companion article on why a leaky kitchen faucet single handle drips and how to fix it yourself shows the teardown in detail. And if you’re wondering what’s actually inside that little cylinder and whether you need a specific material, this breakdown of the copper faucet cartridge explains the differences so you buy the right part the first time.
How to replace a single handle faucet cartridge
- Shut off both supply valves and open the handle to relieve pressure.
- Pop off the handle cap (usually a small colored button), remove the set screw with an Allen key, and lift the handle off.
- Remove the retaining nut or clip holding the cartridge. Note the cartridge’s orientation — many have a flat or notch that must line up, or hot and cold will be reversed.
- Pull the cartridge straight up. If it’s stuck with scale, a cartridge puller or gentle pliers plus a wiggle usually frees it.
- Take the old cartridge to the store or match the model number — cartridges are brand-specific. Bring the O-rings too if they look worn.
- Coat the new cartridge O-rings with plumber’s silicone grease, insert it in the same orientation, reassemble, and test on low pressure first.
What if the leak is at the base of the faucet where it meets the sink?
If the cabinet is wet directly under the faucet’s mounting hole and the supply connections are dry, the base seal has failed. Water is pooling on top of the sink deck (often hidden behind the faucet), then running down the mounting shank and dripping off the bottom into the cabinet. The fix is to pull the faucet up, clean off the old plumber’s putty or gasket, and re-seat it with a fresh seal.
This one’s sneaky because the puddle on top can be invisible — it collects behind the handle where you never look. Wipe the deck around the faucet base bone dry, run the water and splash the handle area a bit, then feel around the base. If it’s wet up top, the culprit is a dried-out base gasket or missing bead of silicone under the escutcheon (the decorative plate). Underneath, the mounting nut may also have loosened, letting the whole faucet rock slightly and break the seal.
Re-sealing means loosening the mounting nut from below, lifting the faucet, scraping the old gasket/putty off both the faucet and the sink, and re-bedding it with a new rubber gasket or a thin ring of 100% silicone. If your faucet is more than a decade old and you’re already this far in, it’s often the moment to just replace it — our step-by-step on how to actually replace a bathroom faucet covers the full removal and remount so you’re not doing this twice.
Quick diagnosis: match your symptom to the fix
Here’s the whole thing on one screen. Find your symptom, read across, and you’ll know the part, the cost, and whether it’s a DIY job.
| Where / when it leaks | Most likely cause | Fix | Typical part cost | DIY difficulty |
|---|---|---|---|---|
| At braided line nuts, even when handle is off | Loose nut or worn cone washer | Tighten ¼ turn or replace supply line | $6–$10 | Easy |
| At the wall shut-off valve, constant weep | Failing angle stop / packing nut | Snug packing nut; replace valve if it persists | $0–$15 | Medium (call a pro to replace) |
| Down the faucet body, only when handle is open | Worn cartridge or O-rings | Replace cartridge | $10–$25 | Medium |
| Under the mounting hole, deck wet on top | Failed base gasket / loose mounting nut | Re-seal base or replace faucet | $0–$8 (seal) | Medium |
| Rust/green corrosion around any joint | Long-term slow leak + mineral buildup | Replace corroded line and valve | $15–$40 | Medium |
When should I just replace the faucet instead of repairing it?
Replace the whole faucet when the body is corroded, the brand no longer sells the cartridge, or you’ve fixed two different leaks in the same year. A single handle faucet is worth repairing when it’s a quality unit under ~8 years old with parts still available; below $60 big-box faucets with pot-metal bodies and proprietary cartridges are often cheaper and less frustrating to replace than to chase leak after leak.
The math is simple. A cartridge plus a supply line is $20–$35 and an evening of work. A solid mid-range single-handle faucet with a lead-free brass body and a ceramic-disc cartridge starts around $70–$120 and comes with fresh seals, a new supply setup, and a warranty. If your current faucet is generic, corroded, or you can’t source the right cartridge, replacement is the better long-term value — and you reset the clock on every seal at once.
When you do shop, two specs matter most for leak resistance: a solid brass body (not zinc alloy, which cracks and corrodes) and a ceramic-disc cartridge (the most durable type, rated for hundreds of thousands of on/off cycles). Those two features are what separate a faucet you fix once from one you fix every spring.
How do I prevent under-sink leaks from coming back?
Prevent repeat leaks by replacing braided supply lines every 8–10 years, hand-checking the connections twice a year, and not overtightening anything. Most under-sink leaks are slow, aging-rubber failures — they announce themselves long before they flood, so a two-minute seasonal check with a dry paper towel catches almost all of them early.
- Feel every connection each spring and fall. A dry paper towel around each nut tells you everything in 30 seconds.
- Swap braided lines proactively at ~10 years. They’re cheap insurance against a cabinet flood while you’re on vacation.
- Don’t overtighten. Snug plus a quarter turn. Cranking splits washers and cracks valve bodies — the number-one DIY-caused leak.
- Keep a small leak-detection puck or plain paper towel in the cabinet. It’ll show a stain from a weep long before you’d see standing water.
- Descale hard-water areas. Mineral buildup is what kills cartridges early; if you have hard water, expect cartridges to wear faster and keep a spare.
FAQ
Can I use a leaking single handle faucet until the weekend?
Only if it’s a spout drip. If water is escaping under the sink into the cabinet, shut off the two supply valves and leave the faucet off until you fix it — an under-sink leak soaks the cabinet base, warps particleboard, and can grow mold within days. Turning off the angle stops stops the leak instantly without cutting water to the rest of the house.
Why does my faucet leak underneath only when I turn on the hot water?
Because heat expands and softens rubber seals. A hot-only leak points to a worn O-ring or cartridge seal on the hot side, or a hot supply line whose washer has hardened and no longer flexes to seal when it heats up. Replace the cartridge and, if the hot braided line is old, swap it too.
Is thread tape or plumber’s putty better for stopping an under-sink leak?
Neither seals a braided-line connection — those rely on a rubber cone washer. Use PTFE thread tape on threaded metal-to-metal joints like a valve inlet, and use plumber’s putty or 100% silicone under the faucet base gasket. Putting tape or putty on the wrong joint often makes leaks worse by preventing the correct seal from seating.
How much does a plumber charge to fix a single handle faucet leaking under the sink?
Expect roughly $100–$250 for a cartridge or supply-line repair, and more if a shut-off valve or the whole faucet needs replacing. Because the parts are $10–$35 and the labor is under an hour, this is one of the most cost-effective repairs to DIY — most people can do it with an adjustable wrench and an Allen key.
My faucet still drips under the sink after I replaced the cartridge — what did I miss?
Usually one of three things: the cartridge was seated in the wrong orientation, the O-rings weren’t greased and got pinched, or the actual leak was on the supply side the whole time. Re-check with the dry-paper-towel test on the supply nuts while the handle is fully off — if it re-wets with the handle closed, it was never the cartridge.
Are single handle faucets more leak-prone than two-handle faucets?
No — they’re generally less leak-prone because they have one cartridge and fewer total seals than a two-handle faucet, which has two valve stems that can each fail. The trade-off is that when the single cartridge does wear, it affects both temperature and flow, so you notice it sooner. A quality single-handle unit with a ceramic-disc cartridge is one of the most reliable designs you can buy.
A quick word on getting this right
Author note: This guide was written by the WOWOW product and support team, who field real customer leak reports every week and disassemble returned faucets to see exactly which seal failed and why. The four-point diagnostic above is the same one our support reps walk customers through on the phone.
About WOWOW: WOWOW designs single-handle kitchen and bathroom faucets built around solid brass bodies and ceramic-disc cartridges — the two features that most directly prevent the leaks described here. Our faucets are tested to industry cycle-life and lead-free water-safety standards (cUPC / NSF/ANSI 61), and every faucet is backed by a manufacturer warranty with free replacement cartridges and parts. If you’re troubleshooting one of our faucets and can’t identify the leak source, reach out through www.wowowfaucet.com and we’ll match your model to the exact cartridge and seal kit.
\n
Related Guides
\n
- \n
- How Do I Fix a Leaky Faucet Cartridge Handle Myself in Under an Hour?
- How to Fix A Leaky Faucet
- Why Is My Leaky Kitchen Faucet Single Handle Dripping, and How Do I Fix It Myself?
\n
\n
\n
\n