A faucet handle that keeps popping out can be more than an inconvenience—it’s a sign that something inside your faucet has loosened, worn down, or simply shifted over time. Whether you’re dealing with a bathroom faucet or a kitchen fixture, a loose handle affects daily use and often indicates a small issue that can become a bigger repair if left unchecked. The good news? Fixing a faucet handle that pops out is usually simple and requires only basic tools.
In this guide, you’ll learn why faucet handles pop out, how to diagnose the underlying cause, and the step-by-step process to fix the problem permanently.
Why Faucet Handles Pop Out
Before diving into repairs, it’s important to understand what causes a faucet handle to behave this way. A faucet handle “popping out” typically means it lifts up from its base, wiggles excessively, or even detaches when turned. Common causes include:
1. Loose Set Screw
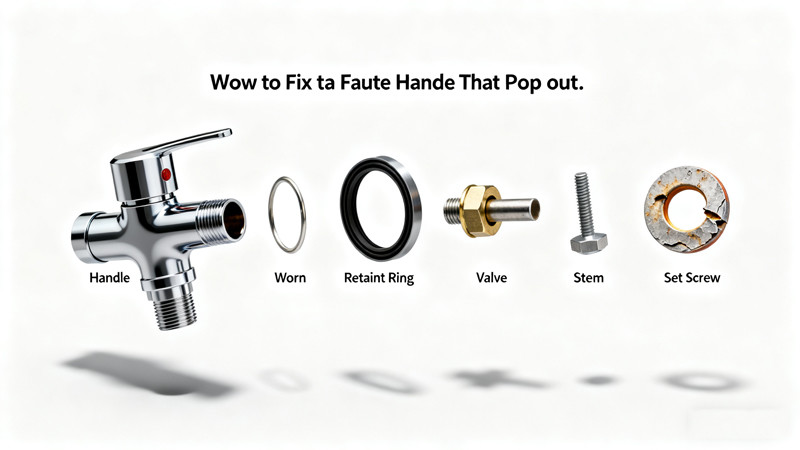
Most faucet handles are held in place by a small set screw—often hidden behind a decorative cap or on the side of the handle. Over time, repeated use makes this screw loosen, reducing its ability to grip the cartridge stem.
2. Damaged or Stripped Handle
If the internal grooves of the handle are worn or stripped, it can no longer grip the cartridge stem securely, causing the handle to slip or pop out.
3. Worn Faucet Cartridge
The cartridge stem (the part the handle attaches to) can become worn or loose, reducing its stability.
4. Broken Retainer Clip or Pin
Some cartridge-based faucets use a retainer clip to hold everything in place. When this clip weakens or breaks, the faucet handle may detach easily.
5. Mineral Buildup
Hard water deposits can affect how components sit together, causing misalignment.
Once you understand the cause, fixing the problem becomes much easier.
Tools and Materials You May Need
- Allen wrench (hex key)
- Phillips or flathead screwdriver
- Adjustable wrench
- Replacement cartridge or handle (if necessary)
- Plumber’s grease
- Vinegar (for cleaning mineral buildup)
- Soft cloth or rag
Step-by-Step Guide to Fixing a Faucet Handle That Pops Out
Step 1: Turn Off the Water Supply
Even though you’re only working with the handle, it’s best practice to shut off the water supply. This prevents accidental leaks or pressure changes.
Locate the shut-off valves under the sink and turn them clockwise to close.
Step 2: Inspect the Handle’s Set Screw
Most loose handles can be fixed simply by tightening the set screw.
- Look for a small cap or plug on the handle.
- Pry it off gently using a flathead screwdriver.
- Use the correct size Allen wrench to tighten the screw.
- If the handle no longer pops out after tightening, your job is done.
Step 3: Check for Damage or Wear
- If tightening the screw didn’t help, remove the handle completely.
- Loosen the set screw and slide the handle off.
- Inspect the inside of the handle.
- Are the grooves smooth?
- Is the metal worn or cracked?
- If the handle is stripped, replace it with an identical model.
- A damaged handle cannot grip the cartridge stem, so no amount of tightening will fix the issue.
Step 4: Inspect the Cartridge Stem
If the handle is in good shape, the next component to check is the cartridge stem.
- Wiggle the stem gently.
- If it feels loose or unstable, the cartridge may be worn.
- Look for cracks, corrosion, or movement that shouldn’t be there.
A worn cartridge is the most common cause after a loose set screw.
Step 5: Replace the Cartridge if Necessary
Cartridge replacement is straightforward:
- Remove the decorative cap and handle.
- Unscrew the retaining nut holding the cartridge.
- Use pliers to gently pull the cartridge straight up.
- Insert the new cartridge in the same orientation.
- Re-tighten the retaining nut and reattach the handle.
- Tip: Apply a small amount of plumber’s grease to the O-rings to improve performance and make future repairs easier.
Step 6: Check for a Broken Retainer Clip
Some faucet designs (especially Moen models) use a horseshoe-shaped retainer clip to secure the cartridge.
- If the clip is bent or missing, the handle may lift out unexpectedly.
- Replace the clip with an identical part and install it securely.
Step 7: Clean Away Mineral Buildup
Hard water deposits can create alignment issues, causing the handle to pop out or sit incorrectly.
- Soak the handle base or faucet stem in vinegar.
- Scrub with a small brush.
- Wipe clean and reinstall the components.
This is especially important in older faucets.
Step 8: Reassemble and Test the Handle
Once all components are cleaned, tightened, or replaced:
- Reattach the handle.
- Tighten the set screw firmly.
- Turn on the water supply.
- Test the faucet by rotating the handle fully.
The handle should feel secure, smooth, and stable—without popping out.
How to Prevent Faucet Handles from Popping Out Again
Regular maintenance extends the life of your faucet and helps prevent loose handles.
1. Tighten Screws Annually
A quick 30-second tightening can prevent months of frustration.
2. Clean Mineral Deposits
Wipe the faucet weekly and soak parts in vinegar as needed.
3. Avoid Overturning the Handle
Excessive force accelerates wear.
4. Replace Cartridges Every Few Years
Cartridge wear is gradual but inevitable.
5. Choose High-Quality Replacement Parts
Low-quality components tend to loosen or deform quickly.
When to Call a Professional
If your faucet handle still pops out after replacing the handle and cartridge, the issue may be deeper inside the faucet body or valve. At that point, a plumber can diagnose structural wear or internal damage.
Final Thoughts
A faucet handle that pops out is usually caused by something simple—a loose screw, worn handle, or aging cartridge. With a few basic tools and this step-by-step guide, you can fix the problem in minutes and restore your faucet’s smooth operation. Regular maintenance and proper handling will also help prevent future issues, saving you time and money.
If you’re experiencing persistent handle issues, tackling them early is the key to keeping your faucets working reliably and extending their lifespan.
 WOWOW Faucets


