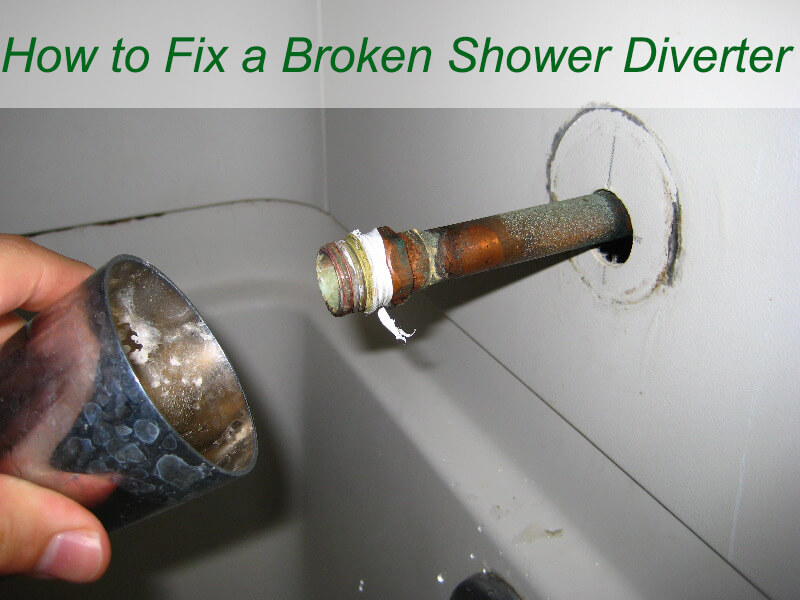
Dealing with a broken shower diverter can be a major inconvenience that disrupts your daily routine. However, fear not! With a little knowledge and some basic tools, you can easily fix it yourself. How to fix a broken shower diverter? In this comprehensive guide, we will walk you through a step-by-step process to tackle this common issue. From identifying the problem to implementing the appropriate fixes, we will cover it all. Additionally, we will share valuable tips and insights to ensure a successful repair, allowing you to regain control over your shower’s water flow and enjoy a relaxing bathing experience once again.
How to Fix a Broken Shower Diverter
Step 1: Gather the Necessary Tools
Before embarking on your shower diverter repair journey, make sure you have the following tools on hand:
- Adjustable wrench
- Screwdriver (Phillips or flat-head, depending on your shower’s design)
- Replacement parts (if required)
- Plumber’s tape
- Cleaning brush or toothbrush
Step 2: Understand Your Shower Diverter
To effectively fix a broken shower diverter, it’s important to familiarize yourself with its structure and operation. Diverter valves can vary depending on the type of shower you have—common types include three-valve, two-valve, and single-handle diverters. Take some time to research and understand your specific type, examining its components and their functions. This understanding will help you troubleshoot and address the problem more effectively.
Step 3: Diagnose the Issue
Before diving into the repair process, you need to diagnose the exact problem with your shower diverter. Common issues include leaks, loss of water pressure, or an inability to divert water from the tub spout to the showerhead. Carefully inspect the diverter, paying attention to signs of damage such as corrosion or mineral buildup. Check the diverter’s seals, as they tend to wear out over time. Use an adjustable wrench to tighten any loose connections you come across.
Step 4: Repair or Replace the Diverter
If your diverter is beyond repair, it’s time to replace it. Start by turning off the water supply to your shower to avoid any accidents. Next, remove the diverter valve using the appropriate tools, making sure not to damage the surrounding plumbing. Take the old diverter with you to the hardware store to find an exact replacement that matches your shower system. Installing the new diverter requires following the manufacturer’s instructions, ensuring a secure and proper fit. Apply plumber’s tape to the threads to create a tight seal and prevent any leaks.
Step 5: Clean and Maintain
Once your diverter is fixed or replaced, it’s crucial to take preventive measures to maintain its functionality. Regular cleaning of the showerhead and tub spout is essential to remove mineral deposits that can affect the diverter’s performance. Use a cleaning brush or toothbrush to scrub away any buildup. Additionally, consider installing a water softener or filter to minimize the chances of future problems related to mineral accumulation.
Tips for Success:
- Take pictures of the diverter and its connections before disassembly. These pictures will serve as a helpful reference during the reassembly process.
- If you feel unsure about the type of diverter or the repair process, do not hesitate to consult a professional plumber for assistance.
- Always remember to turn off the water supply before starting any repair work to avoid accidental flooding.
- When installing the new diverter, make sure to apply plumber’s tape to the threads to create a secure seal and prevent any leaks.
- Perform routine maintenance to keep your shower diverter in optimal condition. Regularly clean and inspect the diverter, as well as the associated components, to catch any potential issues early on.
Conclusion
Fixing a broken shower diverter may seem like a daunting task, but by following a systematic approach and utilizing the right tools, it becomes manageable. By understanding your diverter, diagnosing the issue, and implementing the appropriate repairs or replacements, you can easily restore proper functionality to your shower. The tips provided will ensure a successful repair, enabling you to enjoy a hassle-free and rejuvenating showering experience. With a little patience and effort, you can save both time and money by resolving the issue on your own.
 WOWOW Faucets


您好!Please sign in