Whether you’re a seasoned gardener or simply want to keep your household plumbing safe and compliant, installing a backflow preventer on your outdoor faucet is a smart, simple step. Backflow preventers are essential for keeping contaminated water out of your clean water supply. In this post, we’ll walk you through what a backflow preventer is, why you need one, and exactly how to install it on a faucet.
What Is a Backflow Preventer?
A backflow preventer is a plumbing device designed to stop water from flowing in the opposite direction—back into the clean water supply. It’s particularly important for outdoor faucets, where a hose could be submerged in contaminated water like pesticide-laden garden runoff, dirty buckets, or other sources that can pose a health risk.
Backflow can occur due to a sudden drop in water pressure (a common example is when firefighters tap into hydrants), causing contaminated water to be sucked back into your home’s supply line. A backflow preventer keeps that from happening by allowing water to flow only in one direction.
Why You Need One
- Health & Safety: Prevents cross-contamination that can result in serious health issues.
- Plumbing Code Compliance: Many local building codes require backflow preventers for irrigation systems and outdoor faucets.
- Simple Insurance: A cheap, easy fix that protects a much more expensive water system.
Now that you understand the importance, let’s get to the installation.
Tools and Materials Needed
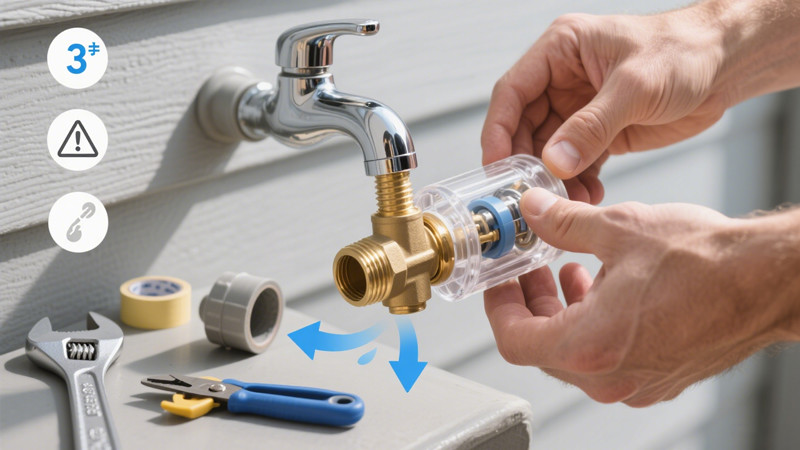
Installing a backflow preventer is a DIY-friendly project that typically takes under 10 minutes. Here’s what you’ll need:
Materials:
- Backflow preventer (also called a vacuum breaker)
- Garden hose (optional, but useful for testing)
Tools:
- Adjustable wrench or pliers (depending on how tight you want to make it)
- Teflon tape (optional, but can help prevent leaks)
Choosing the Right Backflow Preventer
There are a few types of backflow preventers, but for a standard outdoor faucet (also called a hose bib), the most common is a hose bib vacuum breaker. These devices are compact, affordable (usually under $15), and easy to install. Look for one that is ASSE 1011 certified—this ensures it meets plumbing safety standards.
Some backflow preventers are designed to be threaded (screw-on) and removable, while others are permanent and require a special tool to remove. Unless your local regulations require a permanent one, a removable model is typically more convenient.
Step-by-Step Installation Guide
Step 1: Turn Off the Water
Before you begin, shut off the water to the outdoor faucet. You can do this by either turning off the faucet itself or shutting the water off at the main valve if necessary.
Step 2: Remove Any Accessories
Detach any hoses, splitters, or attachments from the faucet. The faucet spout should be clean and free of obstructions.
Step 3: Clean the Threads
Use a dry cloth to wipe any debris or corrosion from the threads of the faucet. If the threads are very dirty, use a wire brush for better contact with the backflow preventer.
Step 4: Apply Teflon Tape (Optional)
If you’re concerned about leaks, wrap the threads of the faucet with plumber’s Teflon tape. Wrap in a clockwise direction to match the way you’ll screw on the device.
Step 5: Screw on the Backflow Preventer
Thread the vacuum breaker onto the faucet by hand. Turn it clockwise until it’s hand-tight. Use an adjustable wrench to snug it up slightly, but don’t overtighten—it should be secure, but overtightening could damage the device or the faucet.
Most vacuum breakers have a small screw on the side; this is typically an anti-removal screw for permanent installations. If you’re not required to install it permanently, you can leave this alone.
Step 6: Turn the Water Back On
Slowly open the faucet to restore water flow. Listen and look for any signs of leaks around the threads. If water is dripping from the connection, gently tighten the backflow preventer a bit more.
Step 7: Test the Device
Attach a garden hose and test water flow. Make sure that when the water is turned off, the vacuum breaker allows air into the hose (you may hear a soft hissing sound). This is a sign the device is working—it’s preventing back-siphonage by breaking the vacuum.
Maintenance Tips
Backflow preventers are generally low-maintenance, but here are a few things to keep in mind:
- Inspect Annually: Check the device for cracks or corrosion, especially if you live in an area with freezing temperatures.
- Remove in Winter: If you live in a cold climate, remove the backflow preventer before winter and drain the faucet to prevent freeze damage.
- Replace if Necessary: If the device leaks persistently or fails to stop backflow, it may need to be replaced.
Troubleshooting
Leak at the Connection
Try tightening the device a bit more or reapplying Teflon tape.
Whistling or Hissing Noise
Some noise is normal when the water is turned off. If it’s very loud, the device may be faulty or installed too tightly.
No Water Flow
Ensure the vacuum breaker is not clogged and is properly aligned. Remove and reinstall if necessary.
Conclusion
Installing a backflow preventer on your outdoor faucet is a quick, affordable way to protect your household water supply and stay compliant with plumbing codes. With just a few tools and under 10 minutes, you can make your home safer and more resilient.
Whether you’re running a sprinkler, filling a pool, or washing your car, a backflow preventer ensures you’re not unintentionally compromising your water quality. Don’t wait until it’s too late—install one today and enjoy peace of mind.
 WOWOW Faucets